Synchronize Knowledge: Create New Knowledge Sources And Assign Them to Assets
Learn how to create new knowledge assets and sources.
To synchronize knowledge we are using so called knowledge sources. The knowledge associated for each source can than be grouped and made available using knowledge assets. Find out how to do this in the video below or just continue reading!
Show Where to find this functionality
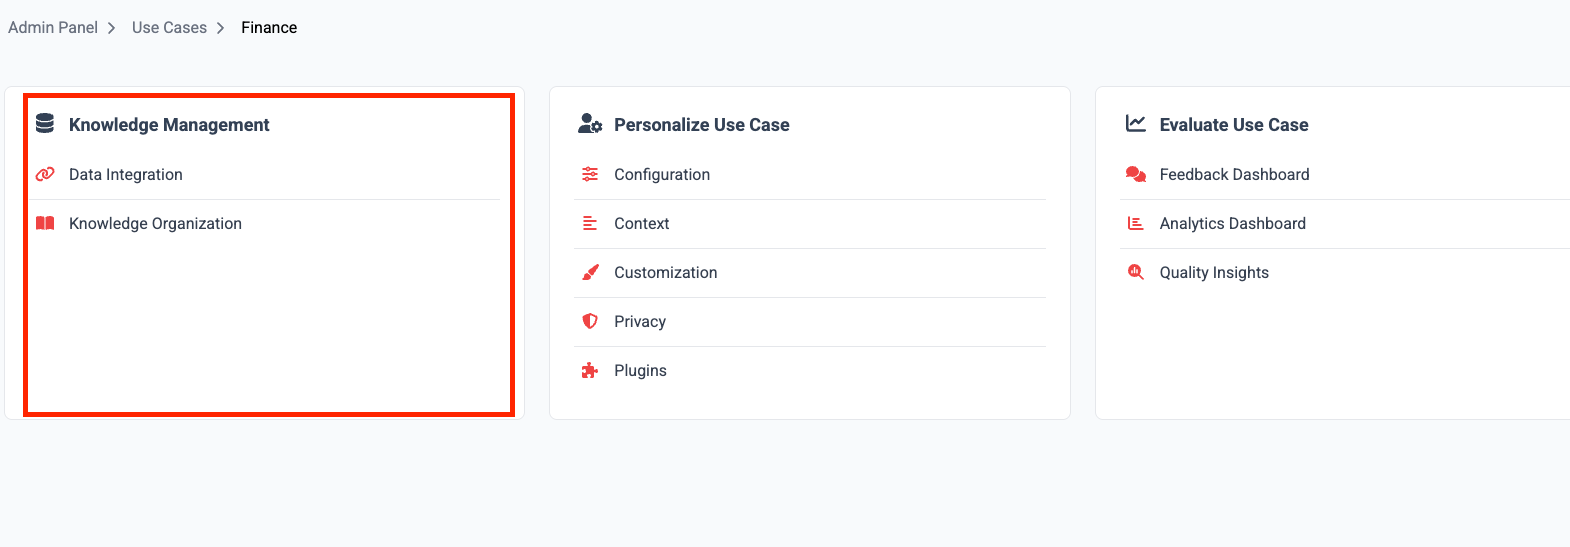
Go to the admin panel and select Agents in the lefthand menu. Find your Agent and click configure. You will find yourself in the Agent settings.
You can configure your knowledge sources via Knowledge Sources and your assets via Knowledge Assets .
If you want to create new sources and make them available to your Agents, you need to follow four steps:
Create a new source and add knowledge to it,
Synchronize the knowledge,
Assign the knowledge source to an asset, and
Request the needed permissions.
In the following, the four steps are described in detail.
Connect your SharePoint at the highest site level (yourcompany.sharepoint.com/site/siteName) with an SPN you will receive from your company. Your IT or internal contact person probably will be able to help you with that. This allows the Genow platform to access your SharePoint Site.
When setting up the SharePoint connector or creating sources, you will need the full site link on the highest level.
Syncing new or updated documents is possible in the admin panel or via scheduled syncs.
The name of your sync, which will also be the name of the knowledge source. Make sure the name can be easily understood by you and your team during future visits
Service Connection: Select your service connection. If nothing is displayed, contact your IT department. The service connection refers to the SPN connected to your SharePoint site.
SharePoint Link: We will use the relevant part of your url and cut off the rest. Minimum amount of information: yourcompanyname.sharepoint.com/sites/SiteName
Go to the next screen with “Continue” to select the scope of the data synchronization.
You can synchronize data from Google Drive either by using a service account or your personal access token. You can select from one of these options during the source creation step. This setting is managed by your IT-department.
To connect to your data from Jira, you have to perform two steps:
1
Setup & Preparation: Connect to Jira
Please provide us the following information. We will set up the service connection credentials for you. When creating a new Jira knowledge source you will have to select the assigned service connection.
You will need the following things to set up and connect Jira:
Server URL,
User account e-mail &
User account access token;
or a combination of
Personal Access Token (PAT) &
Server URL.
2
Select your scope via JQL statement
When setting up a new Jira knowledge source, a JQL statement is needed. A JQL usually consits of three parts:
Field: The item to search against (e.g., project, status, assignee)
Operator: The comparison word (e.g., =, !=, IN, >).
Value: The specific item you’re looking for (e.g., a project name, status, or user).
For our Jira connector, you will select your relevant scope using a JQL statement. JQL (Jira Query Language) is a structured search method that allows you to filter and locate specific issues across your Jira projects using precise logical criteria. In Jira, select your project, go to “All Work” (German: Alle Vorgänge), click the Filter-Button on the top left above your list of issues / tasks:
Apply your needed filters to end up with the selection of issues relevant for your Agent,
In the same filter pop-up window, you can then click on JQL to receive and export your needed JQL statement.
Example for project-number: Each task has a process number, e.g., PROJ-2223. The prefix “PROJ” is sufficient as the project name. project=“PROJ” would be the resulting JQL statement if you want to have every issue from the project exported to Genow.
1
Setup & Preparation: Connect to Confluence
You will need the following things to set up and connect Confluence:
Server URL
API Token
The e-mail of the user associated with the API token
2
Select your scope
For this step a CQL statement is needed. They mostly consits of three parts:
Field: The item you want to search for (e.g., title).
Operator: How to compare (e.g., =, ~ for “contains”).\
Value: The term you’re looking for (e.g., “Meeting Notes”).
You can extract your CQL statement after setting the filters in the article overview and export your URL. The URL will hold your CQL statement after the last ’/’.
We support attachments and images. Labels can be used for filtering.
Preparation:
Reach out to your ServiceNow administrator for the creation of the ServiceNow credential. During the setup of the credential, it is important to follow our guide.
Provide Genow with this credential
Knowledge Source Setup
Select ServiceNow as a connector
Type in a knowledge source name and choose your credential
Select your scope via the folder selection (SharePoint, Google Drive, ServiceNow) or JQL/CQL statement (Jira, Confluence).
You can trigger a synchronization by pressing the Save&Sync button in the content selection screen of a knowledge source. Pressing Save will complete the creation of the knowledge source without synchronization.
Syncs cause costs (as of May 2026: $10 per 1000 pages) and can change the Agent database. Caution is required in this area. Unintentionally selecting the wrong folders or areas can result in incalculable costs and incorrectly change the Agent database.
Data is synchronized incrementally. This means that only new or changed data will be synchronized.
SharePoint Source
Google Drive Source
Jira Source
Confluence Source
Select all relevant folders or loose documents as a whole using the Files batch on each side to synchronize information.
If you add subfolders of folders already selected for a synchronization, you do not have to change the content configuration. Only if you added folders that are not part of a already selected folders, you have to change the configuration!
If you delete elements in SharePoint and then perform a synchronization, the deleted elements will also be unavailable on the Genow platform.
SharePoint pages and lists can be selected in either all or none of them. The selection is done at the highest level, as shown in the screenshot.
Files over 500mb will not be synchronized. If needed we automatically Convert files to PDFs and split them into several files automatically if needed. They will not be split or converted in your own file system.
Depending on your tenants setup, you either use a service account which will be used to share information directly in Google Drive and make these folders available in the selection or use your personal access token to trigger synchronizations.
Show Syncs via Personal Access Token
After creating the sync, you have the option to create a personal access token which uses your account to access your Google Drive permissions. Click on Create Credential or Refresh Credential to do this. A Google pop up will open. Please follow the instructions and grant Genow the access to read you Google Drive items.
After this process has been completed you will be brought back to the Genow platform tab in your browser and you can continue to select relevant data.
Show Sync via Service Account and Sharing Email
1
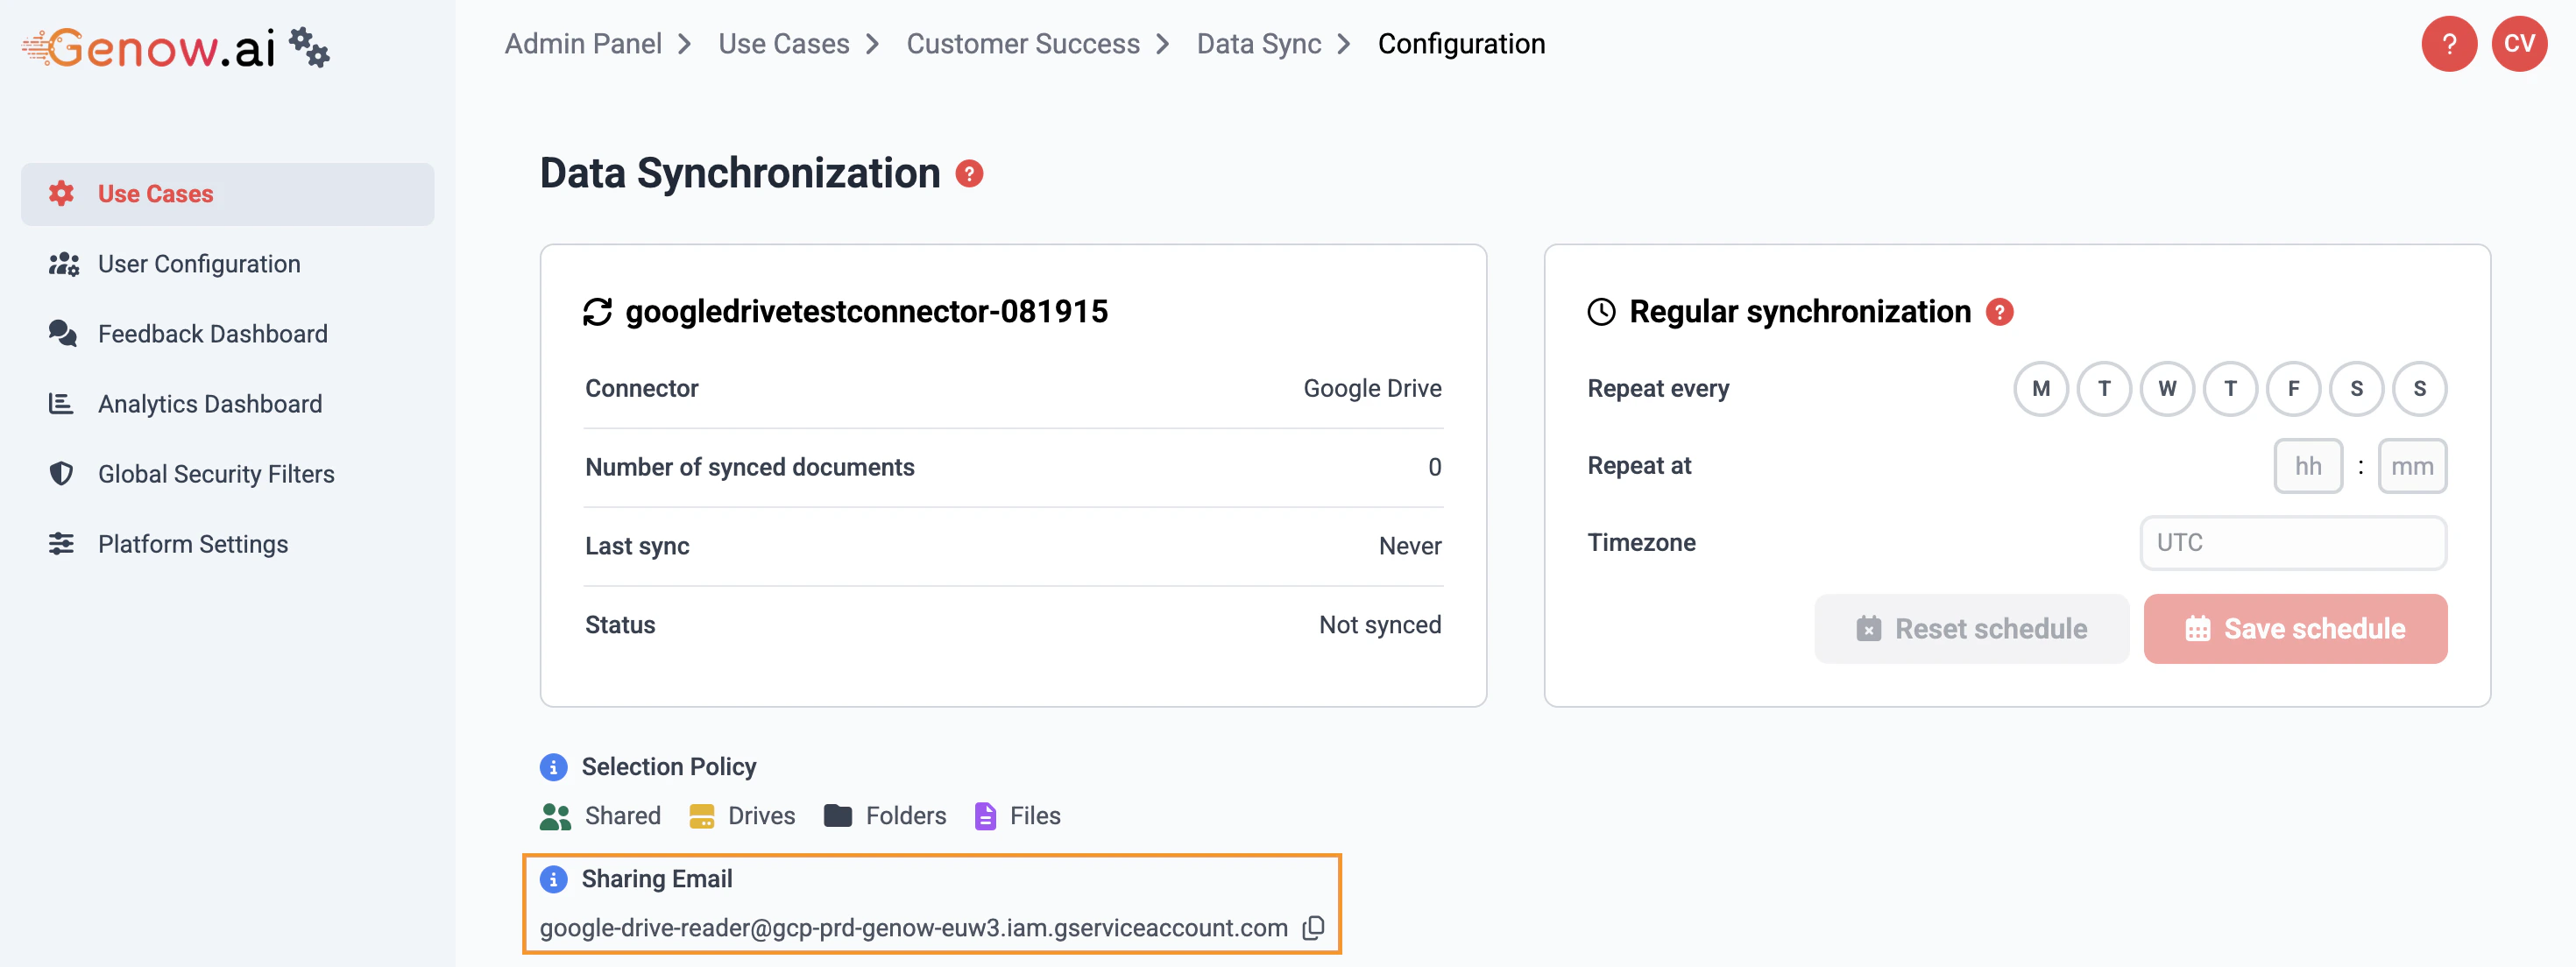
Copy the 'Sharing Email'
After creating the sync, an e-mail address is displayed under “Sharing Email”. Copy this address to the clipboard.
2
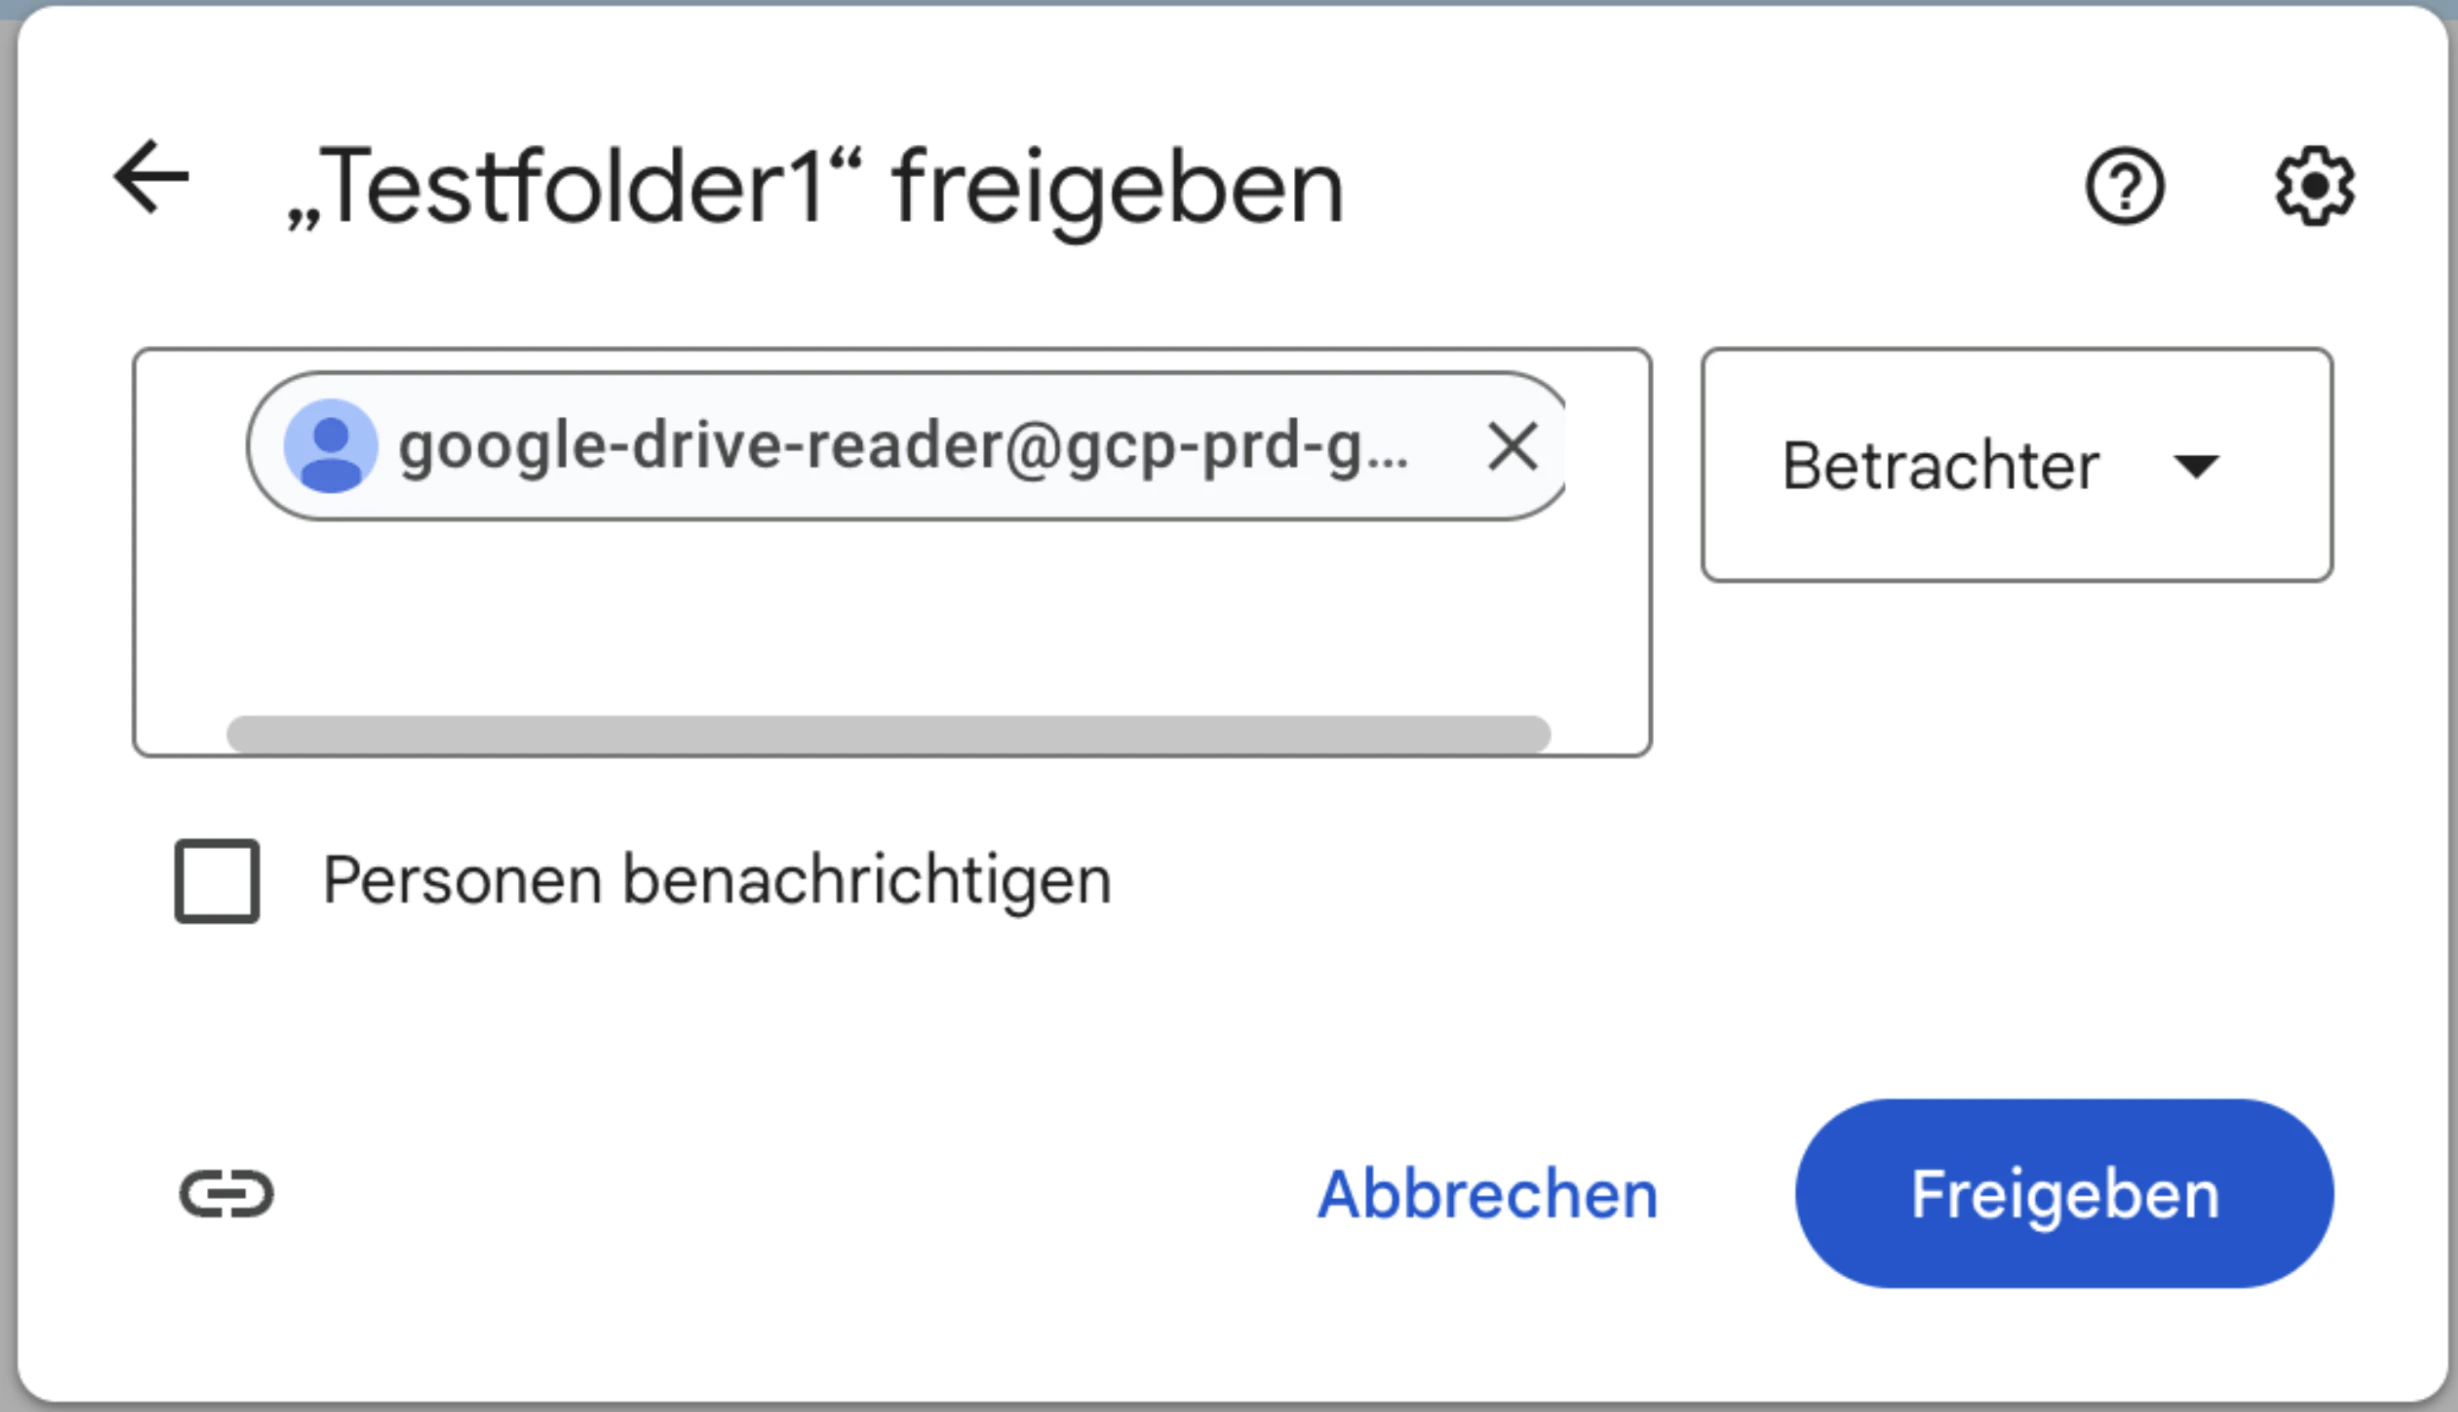
Share the Google Drive root folder
In Google Drive, go to the root folder that contains your desired documents. Click on “Share”.Paste the e-mail address that you copied earlier from the Admin Panel in the . Deselect the option to notify the recipient and change the setting to “Viewer”. Hit “Share” and accept the pop-up notification.
Afterwards the files and documents can be selection in the contents screen in the admin panel (see below).
Select all relevant folders or loose documents as a whole using the Files batch on each side to synchronize information.
If you add subfolders of folders already selected for a synchronization, you do not have to change the content configuration. Only if you added folders that are not part of a already selected folders, you have to change the configuration!
If you delete elements in Google Drive and then perform a synchronization, the deleted elements will also be unavailable on the Genow platform.
Files over 500mb will not be synchronized. If needed we automatically Convert files to PDFs and split them into several files automatically if needed. They will not be split or converted in your own file system.
Select the Jira Source you want to synchronise and you will find yourself in the following screen:
For our Jira connector, you will select your relevant scope using a JQL statement. JQL (Jira Query Language) is a structured search method that allows you to filter and locate specific issues across your Jira projects using precise logical criteria. In Jira, select your project, go to “All Work” (German: Alle Vorgänge), click the Filter-Button on the top left above your list of issues / tasks:
Apply your needed filters to end up with the selection of issues relevant for your Agent,
In the same filter pop-up window, you can then click on JQL to receive and export your needed JQL statement.
If you delete elements in Jira and then perform a synchronization, the deleted elements will also be unavailable on the Genow platform.
Custom Jira fields of your issues are currently not exported nor available in the Genow platform.
For Confluence, the synchronization process is the same as for Jira (see Jira Tab). The only difference is using CQL statements instead of JQL statements.
Selecting ‘Use Confluence labels for filtering’ in the Synchronisation screen will mean that labels assigned to your Confluence articles are synchronized as metadata and can be used for filtering. If you select this option for an already synchronized database, the entire database will be resynced to include the labels.
(3) Add a Source to a Asset to Make It Available to Your Use Case
In general, knowledge assets group knowledge sources in larger knowledge packages and make them available to users.
After creating the source, you need to assign it to an asset. Otherwise, the information stored in the source cannot be retrieved in the Agent! For this, go back to the Agent settings and select Knowledge Assets. You can then either create new assets and assign your knowledge sources to them or manage existing ones.
If you want to create a new knowledge asset follow these three steps:
First, click on create new knowledge asset.
Enter a name for your knowledge asset - the name will be visible to the end users of the use case.
Enter a description for your knowledge asset.
You can select sources to be grouped in existing or new assets.
Select whether the asset should be preselected by default when opening the Agent.
Connect your knowledge sources (“data sources”) - you can select multiple ones.
(4) Request the Needed Permissions to Use the Knowledge Source in Your Agent
Permission roles, which hold a specific set of permissions for a knowledge source, are assigned to a permission group from your company’s IAM system.
Contact your IT department to assign new permissions to groups or add new users to existing ones. One role is needed per user group.
1
Export Required Permission
We distinguish between two scenarios:1. All users (or a specific user group) should be able to access all the knowledge sources assigned to the Agent:
In this case, you can use our standard roles which hold the permission for all sources.
The needed role permission can be exported from the Agent overview screen in the admin panel.
Notation: useCase.[UseCaseID].User
2. A user group should only have access to a specific set of knowledge sources:
Please reach out to Genow for help to create the specific role.
2
Contact Your It Department to Have the Permission Created
Your IT will need the information about which users / user groups will need which permission. Provide them with a list of users or, if you already know about a group where all your users are already managed, provide the name of this group.
Provide your IT department / internal contact person with:
Permission
List of users (names, emails, permission group per user (i.e. admin, end-user, …)). We would suggest using a table for this.