- Admin access to the Agent in question is available
- Google Drive folders that contain the desired documents are identified
How to Set up a new Google Drive Connector
If you have already set up a Google Drive Connector and want to incorporate a new folder, skip the first steps and start at sharing the folder with the sharing e-mail address in Google Drive (see below).
- Go to the Admin Panel of the Agent in question.
- In the “Knowledge Management” Tab, click on “Data Integration”.
-
Click on “Synchronize new data” in the top right corner.

-
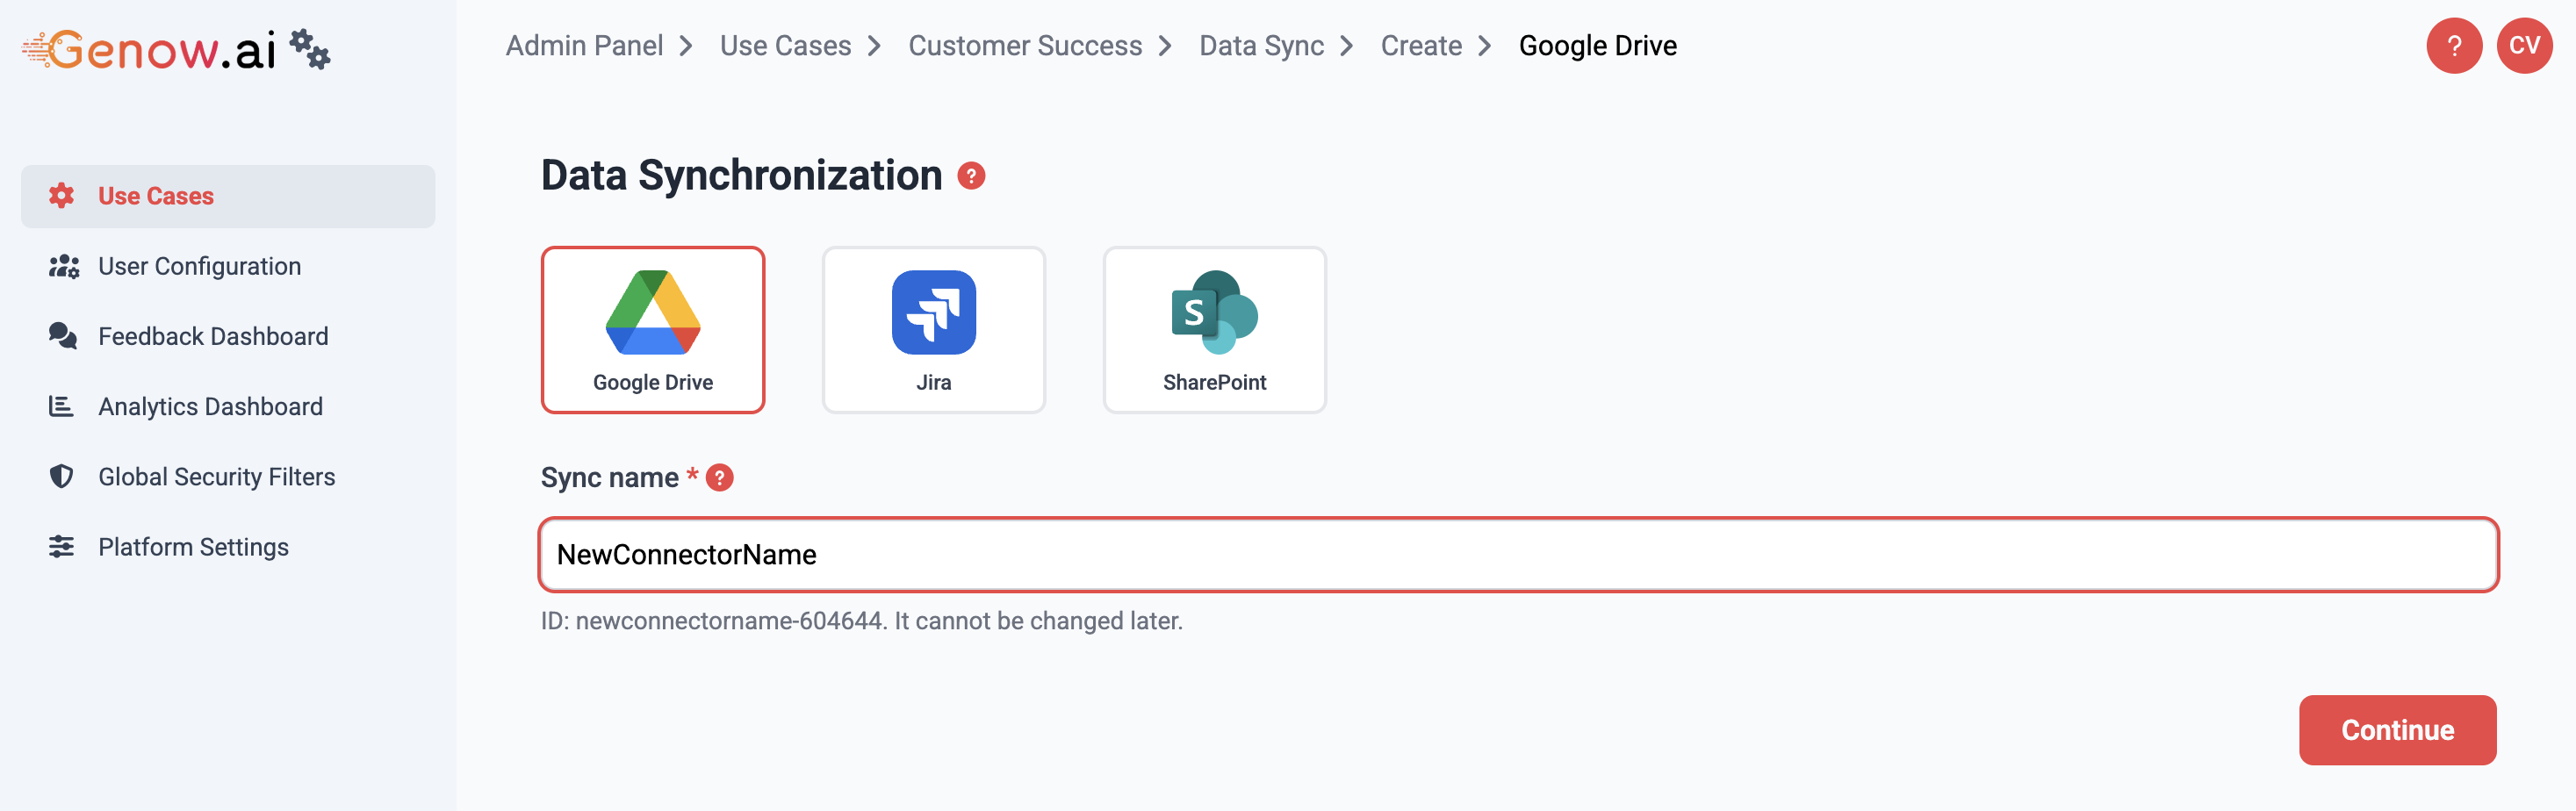
Select the option “Google Drive” and enter a name for the new Connector. Hit “Continue”.
-
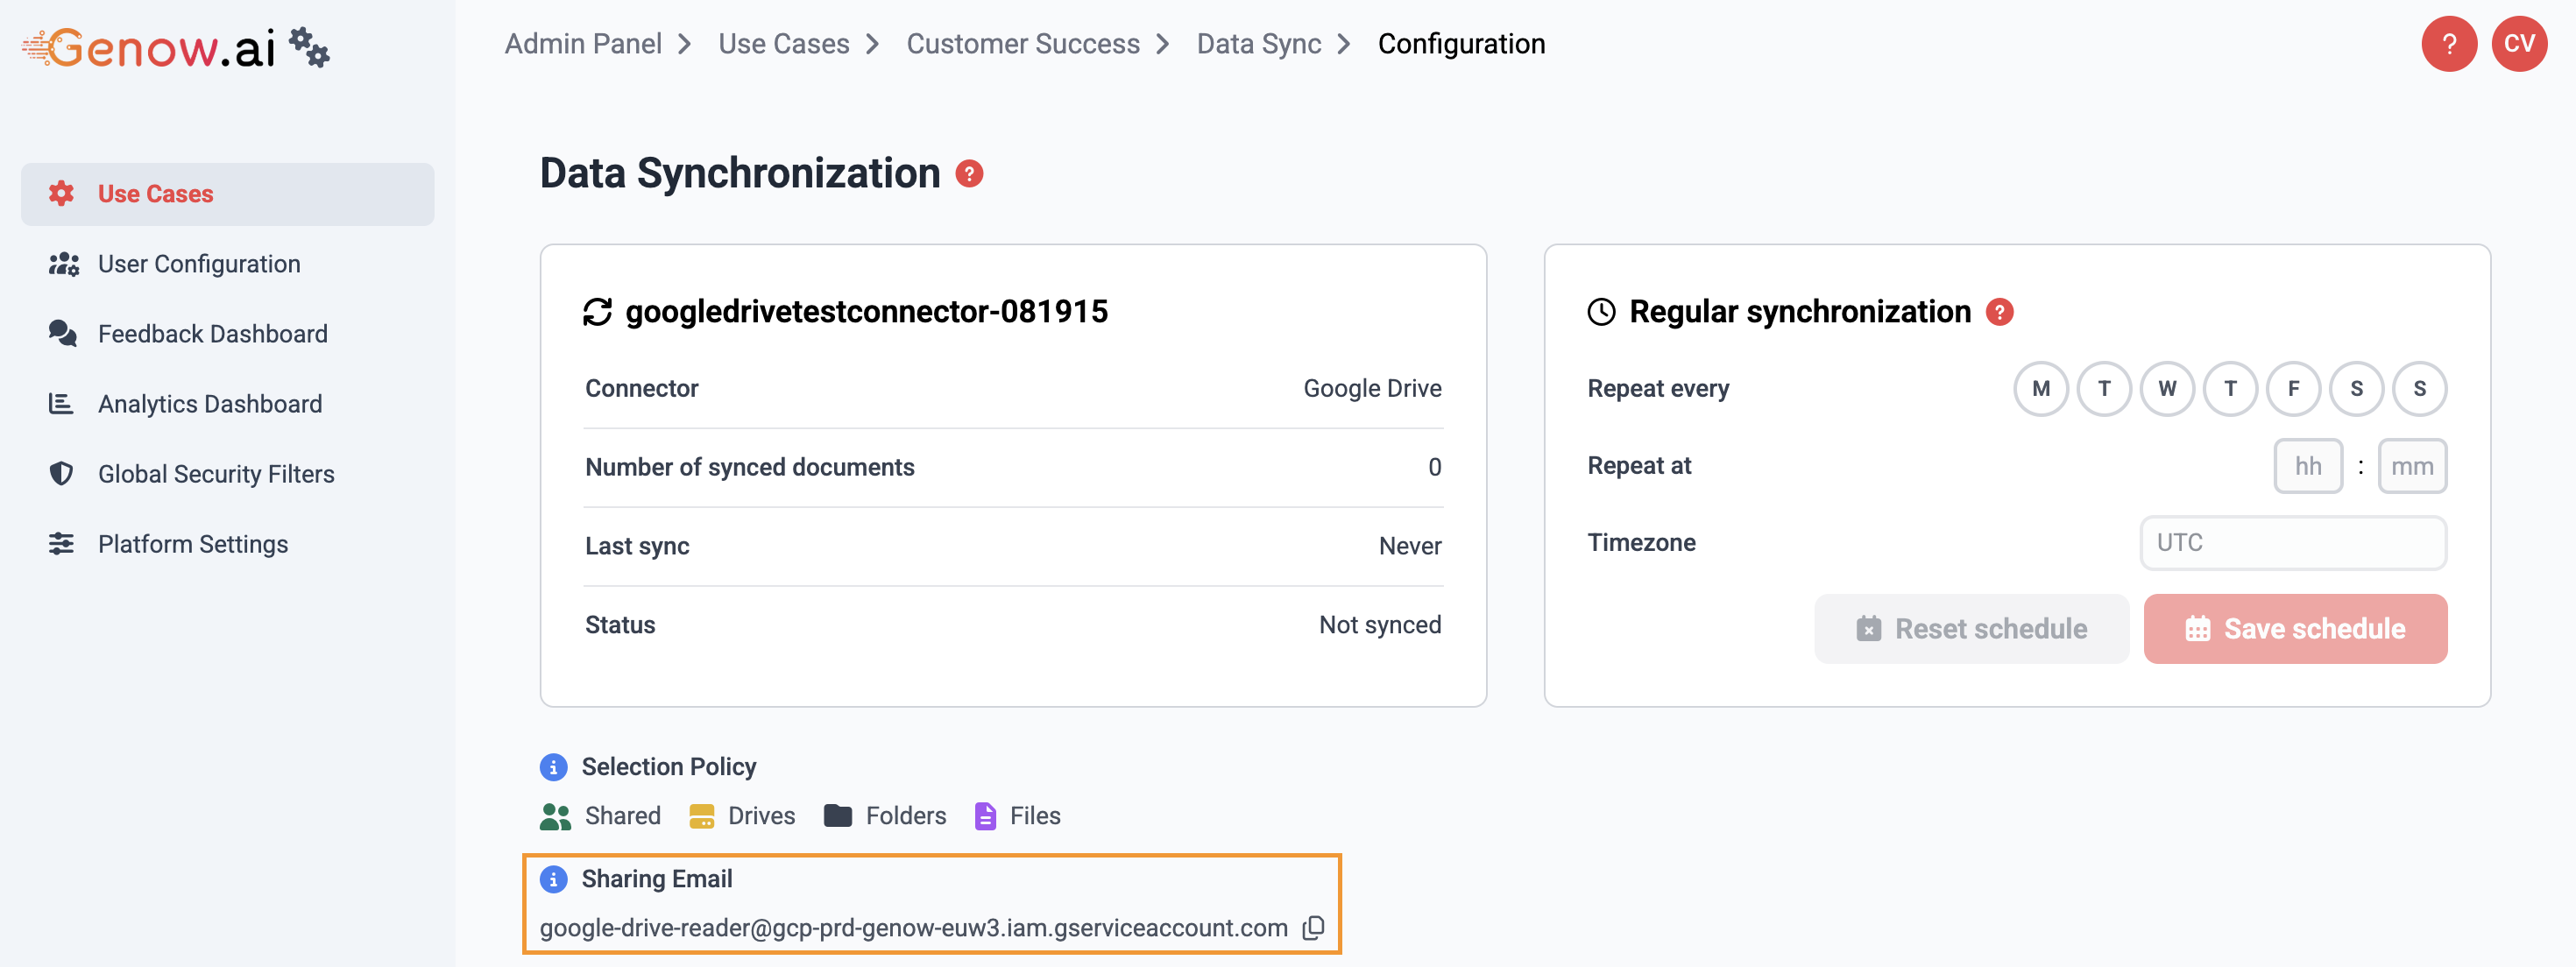
Now, an e-mail address is displayed under “Sharing Email”. Copy this address to the clipboard.
-
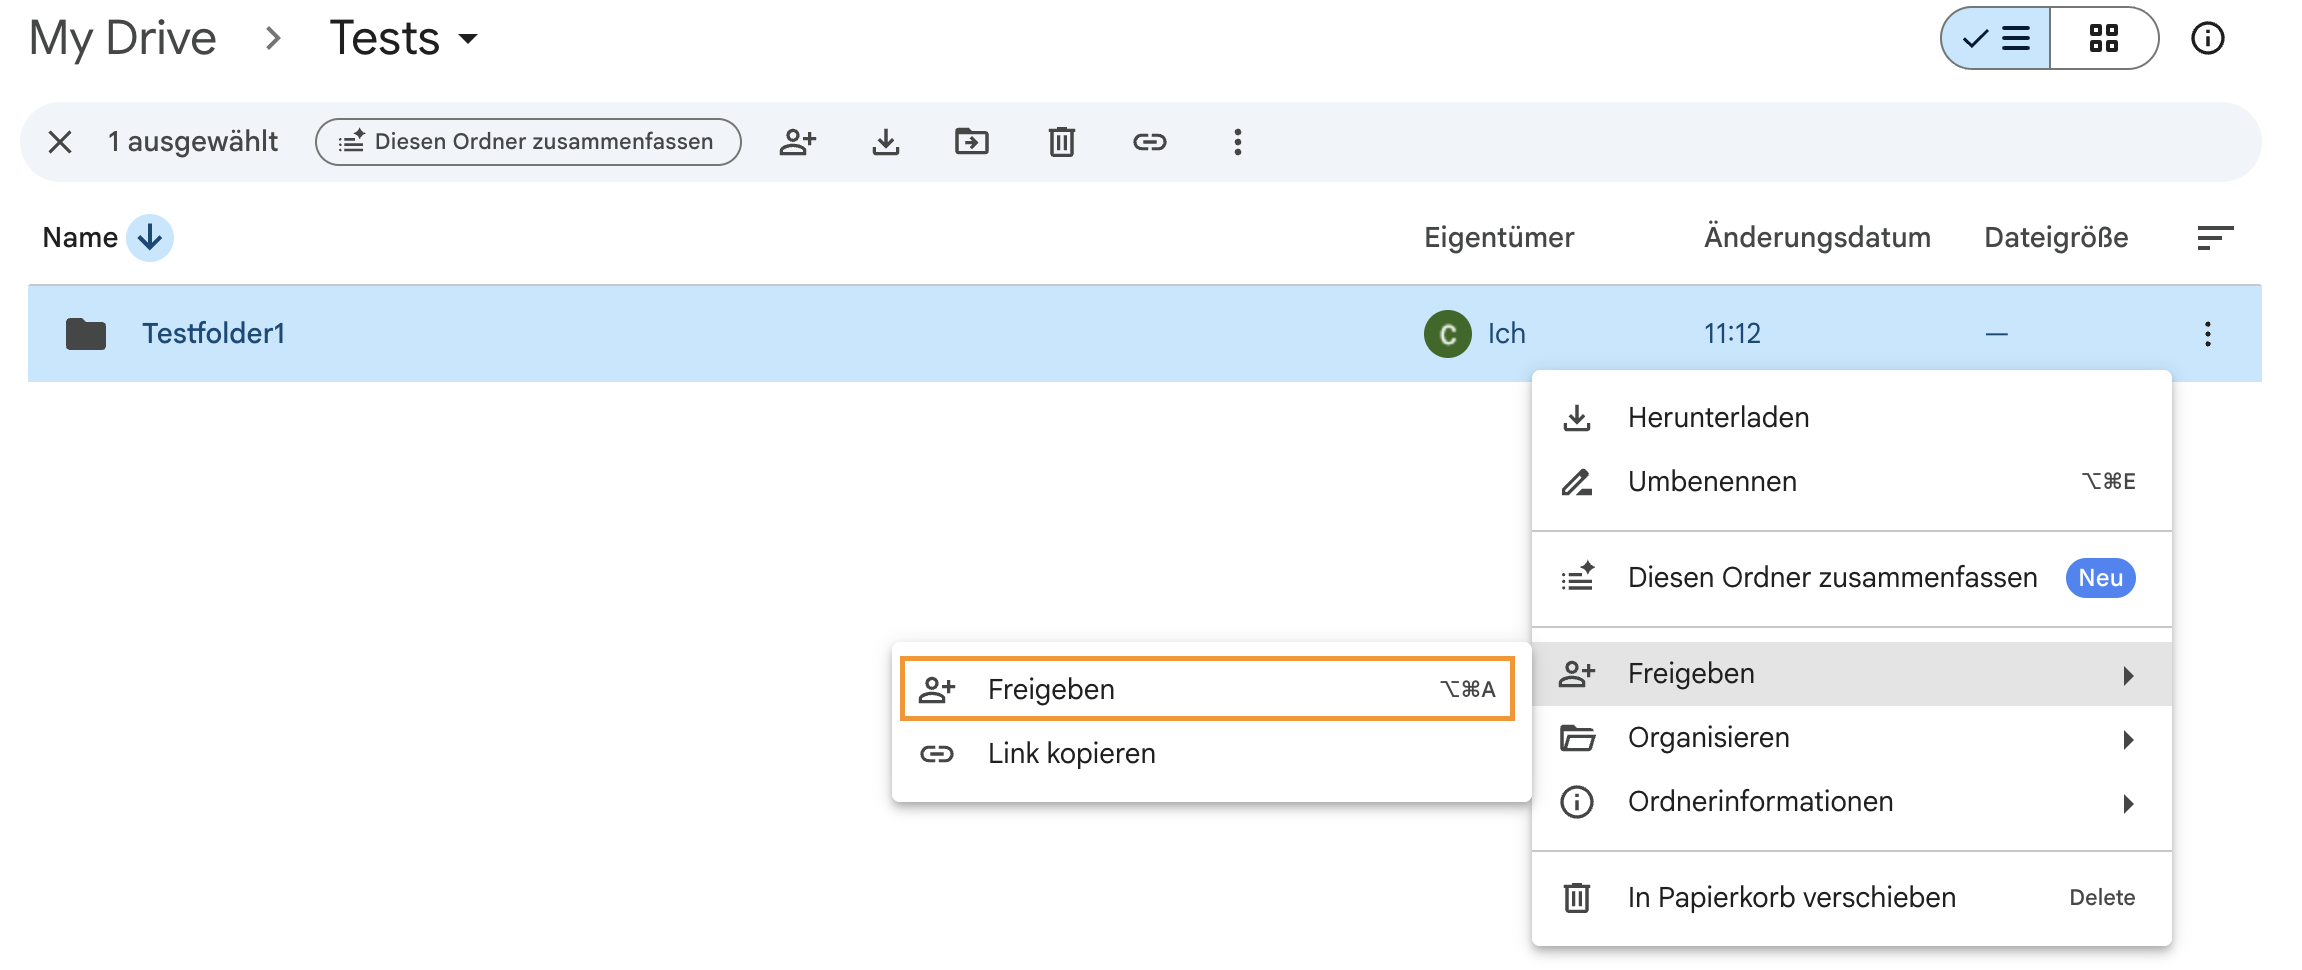
In Google Drive, go to the root folder that contains your desired documents. Click on “Share”.
-
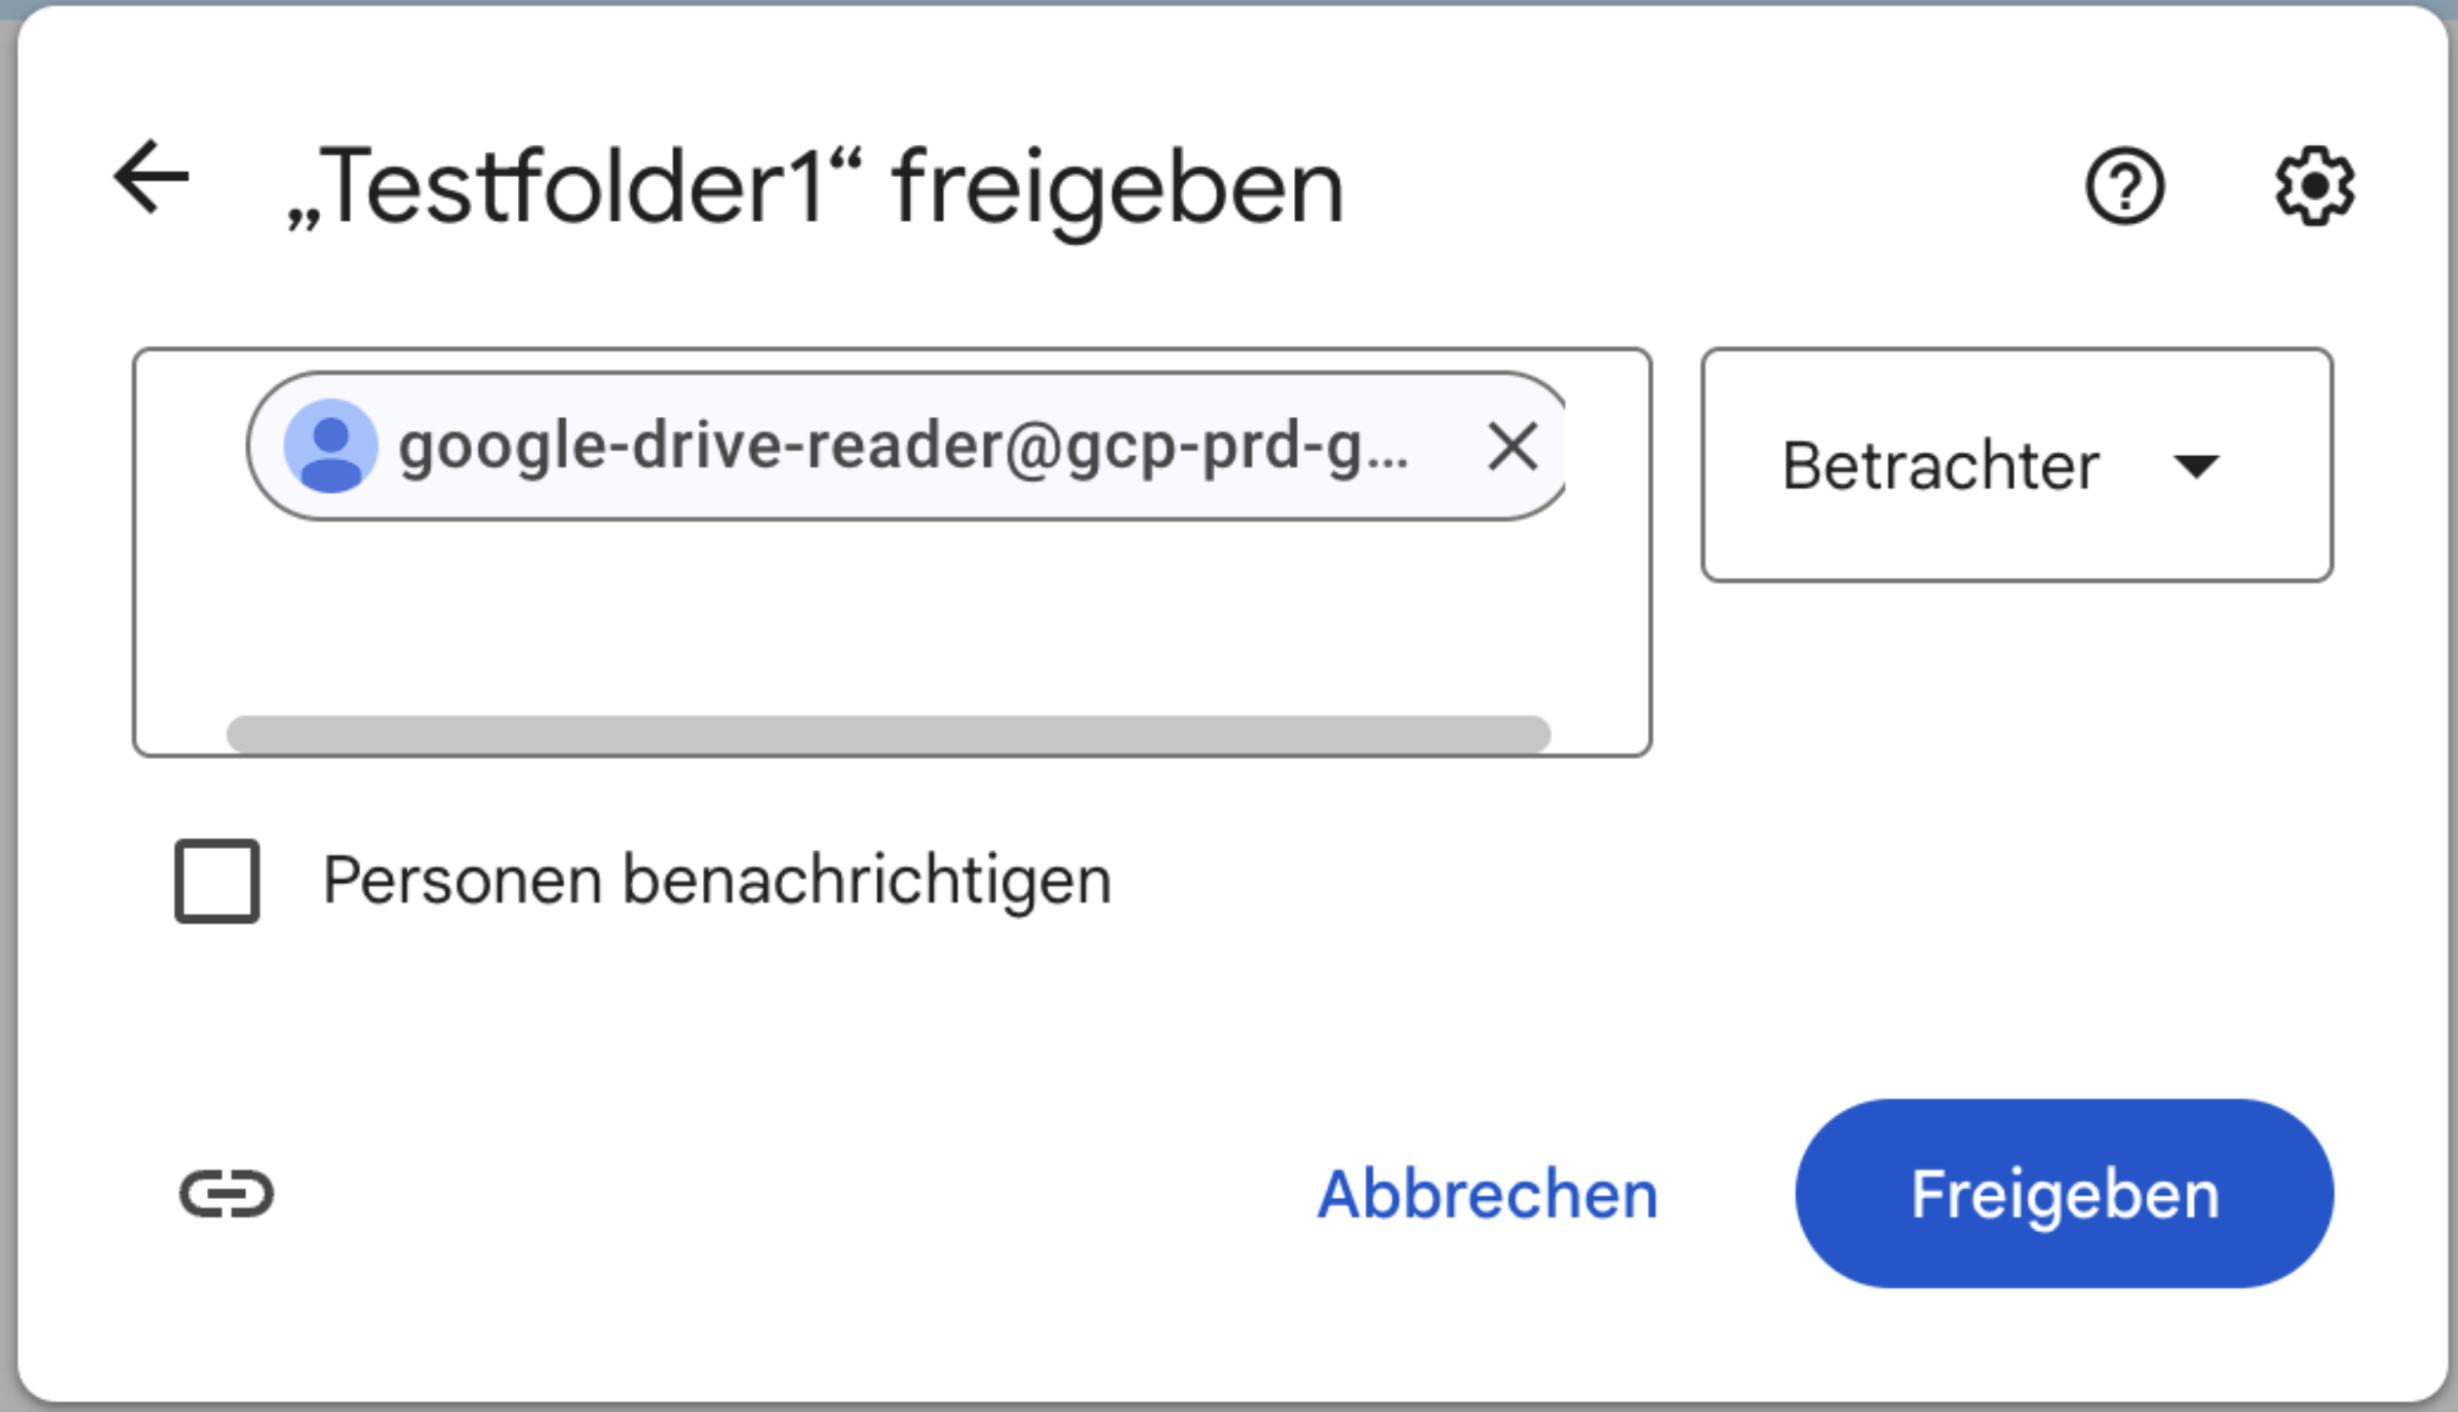
Paste the e-mail address that you copied earlier from the admin panel in the . Deselect the option to notify the recipient and change the setting to “Viewer”. Hit “Share” and accept the pop-up notification.
-
After saving and refreshing the newly created Connector (Admin Panel -> Manage Agents -> desired Agent -> Data Integration -> newly created connector), you can now see the shared Google Drive root folder and its subfolders. Select all desired subfolders to represent your information need.
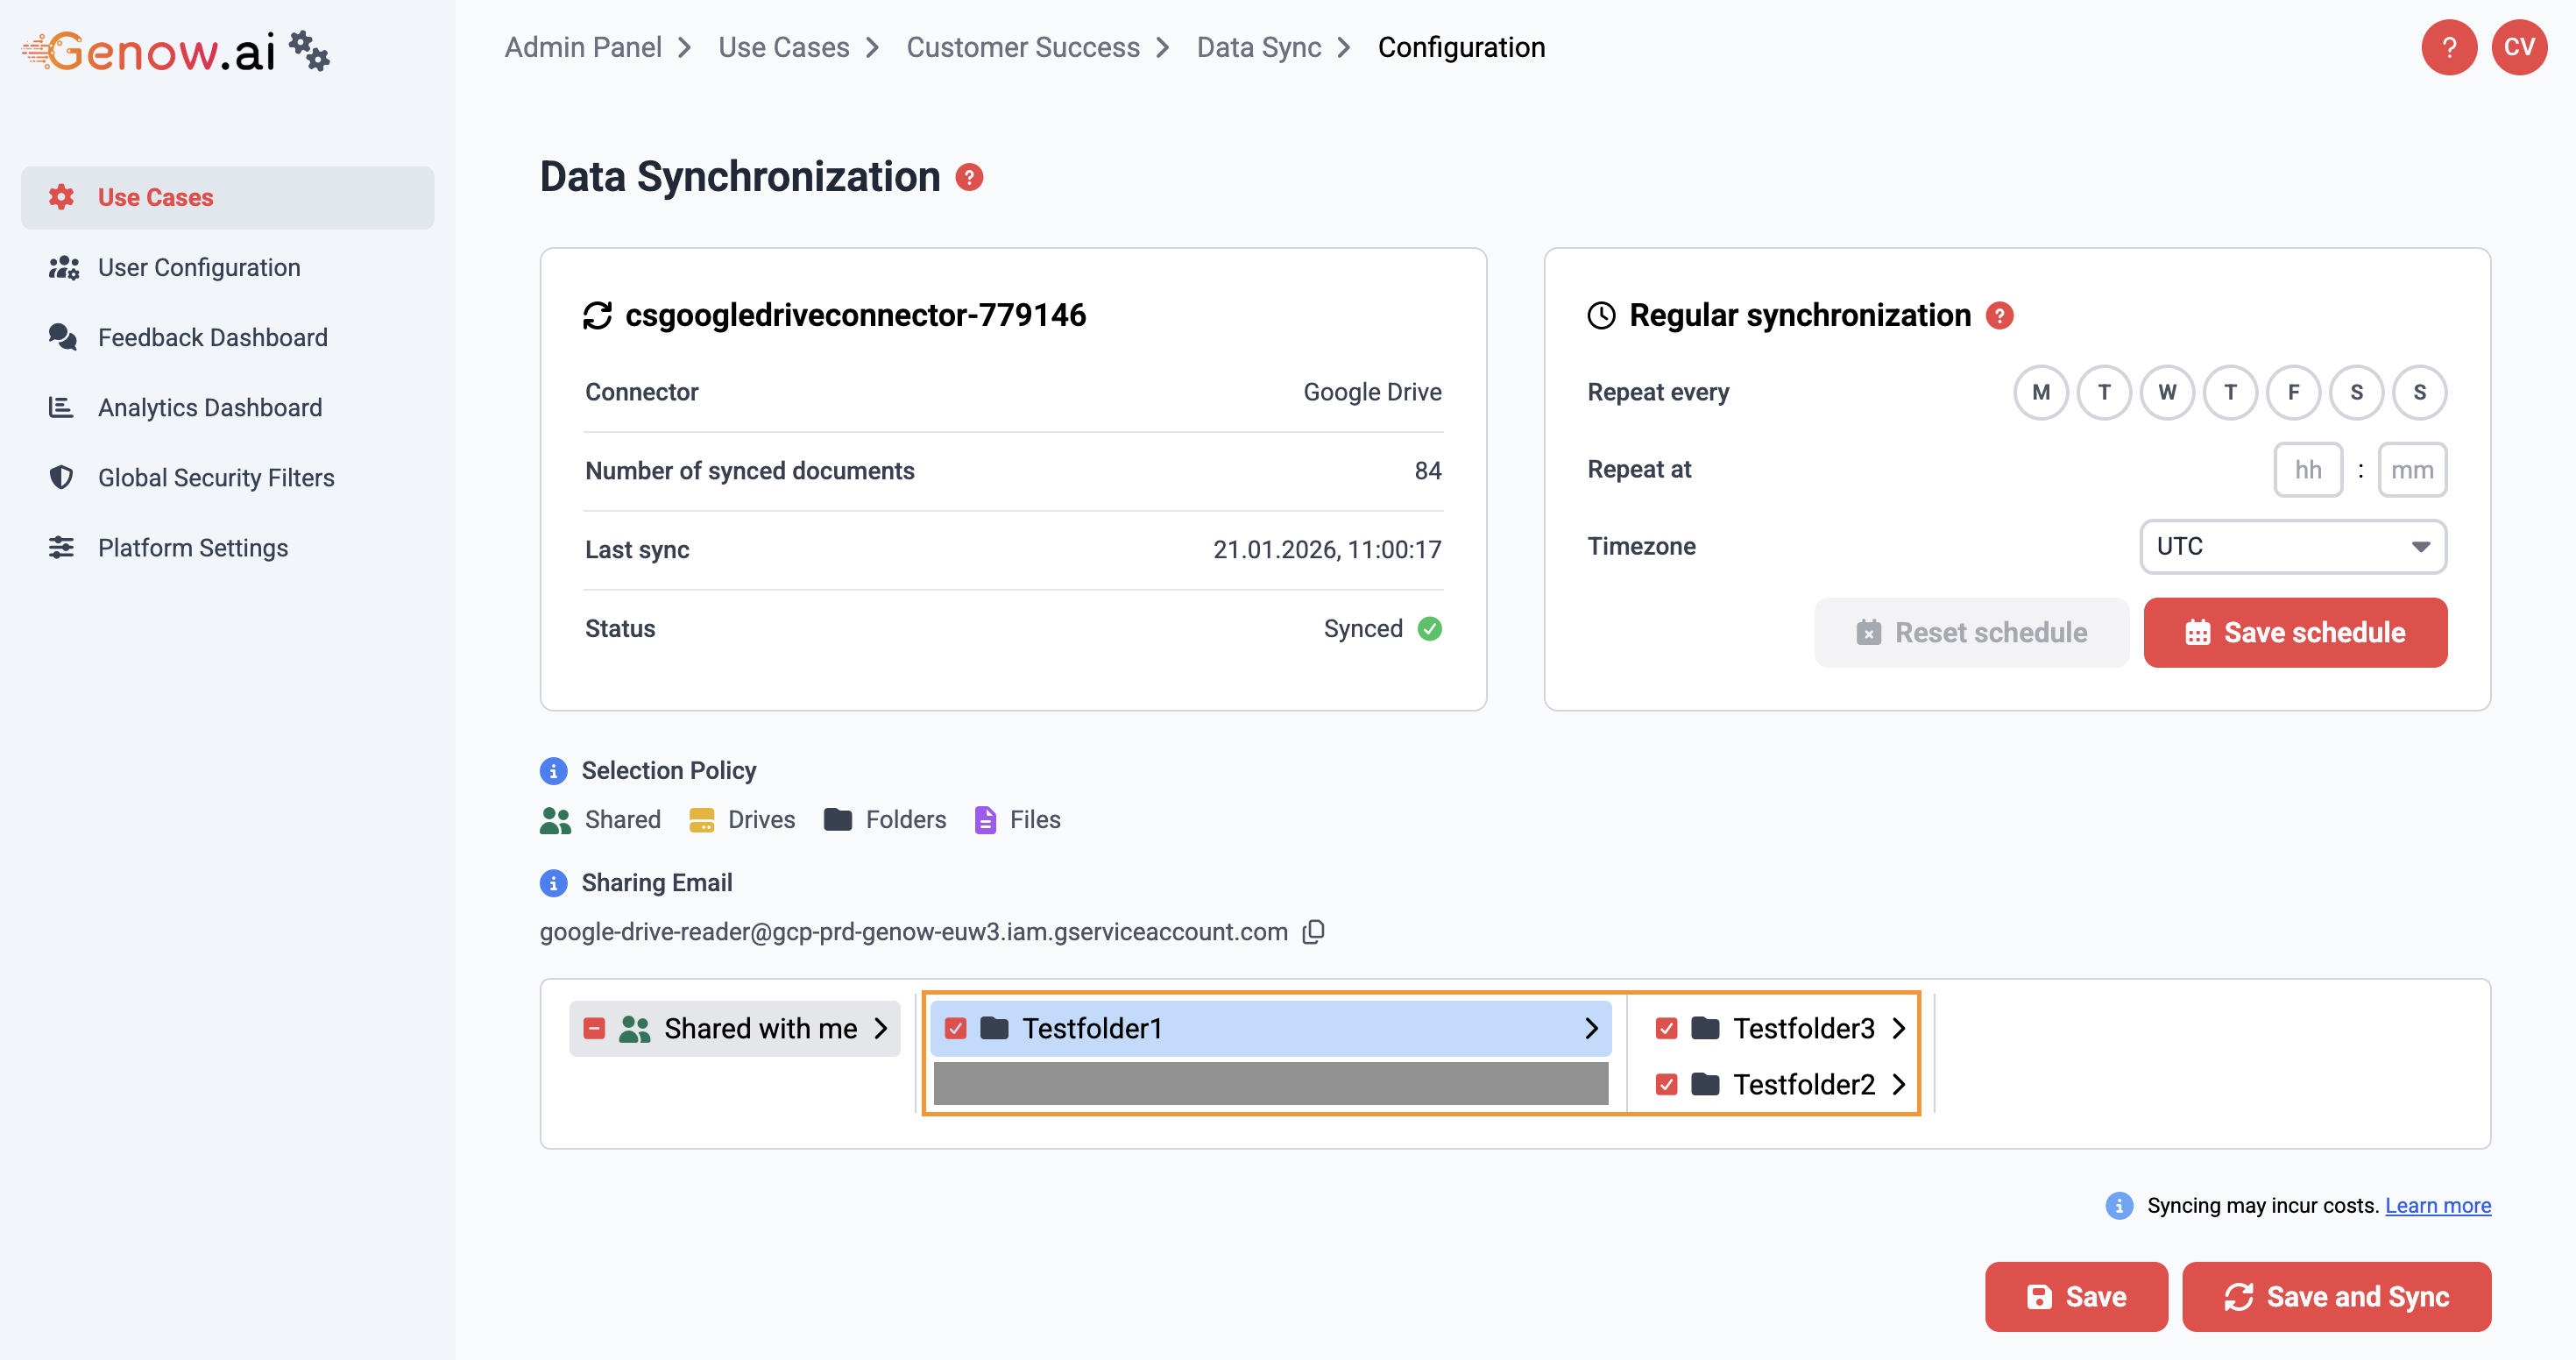
- Click “Save and Sync” to save the folder selection and sync the documents (i.e., preprocessing the contained documents in preparation for search).
That’s it! You have successfully set up a Google Drive Connector. Now, you can integrate the new Connector as a data source in knowledge assets. Have a look at the other tutorials that explain how to manage your Knowledge Base.
OptionalIt is possible to customize the alignment between user permissions and documents used for retrieval. By default, the user can only access the documents defined by his permissions. To change this, simply reach out to the Genow team, so we can adjust it (e.g., broaden or narrow down the scope).