Platform owners can now create Agents via the admin panel in three easy steps. Keep in mind, that a global.Admin permission is needed to perform these steps without further granting permissions in the process.
As a global platform administrator, you can decide whether to set up the Agent yourself and link knowledge to it, or whether to let the Agent administrator do this.
From a procedural perspective, we recommend supporting the Agent administrator during preparation to enable the fastest possible setup (see point 3).
(1) Create a New Agent
First navigate to the admin panel, select Agents in the menu on the left hand side and click the button Create new Agent. You will need to add:- The
name of the Agentwhich will be shown to the end user in both German and Englisch - A
description of the Agentin both German and Englisch. What will the Agent be used for? Who is it aimed at? What data does it contain?
(2) Request the Needed Permissions
Before handing over the Agent to the Agent Admin, make sure that you provide her / him with the necessary permissions to manage the Agent. If you have already received information about the needed permission groups for end users, you can do this as well in the same process.We distinguish between standard roles for Agent administrators and users, who should be able to see (and manage in case you are an admin) all knowledge sources assigned to the Agent, and custom roles, which grant access to a specific set of knowledge sources.
Permission roles are assigned to a permission group in your company’s IAM system. Contact your IT department to assign new permissions to groups or add new users to existing ones. One role is needed per user group. Find out more about permissions here.
Permission roles are assigned to a permission group in your company’s IAM system. Contact your IT department to assign new permissions to groups or add new users to existing ones. One role is needed per user group. Find out more about permissions here.
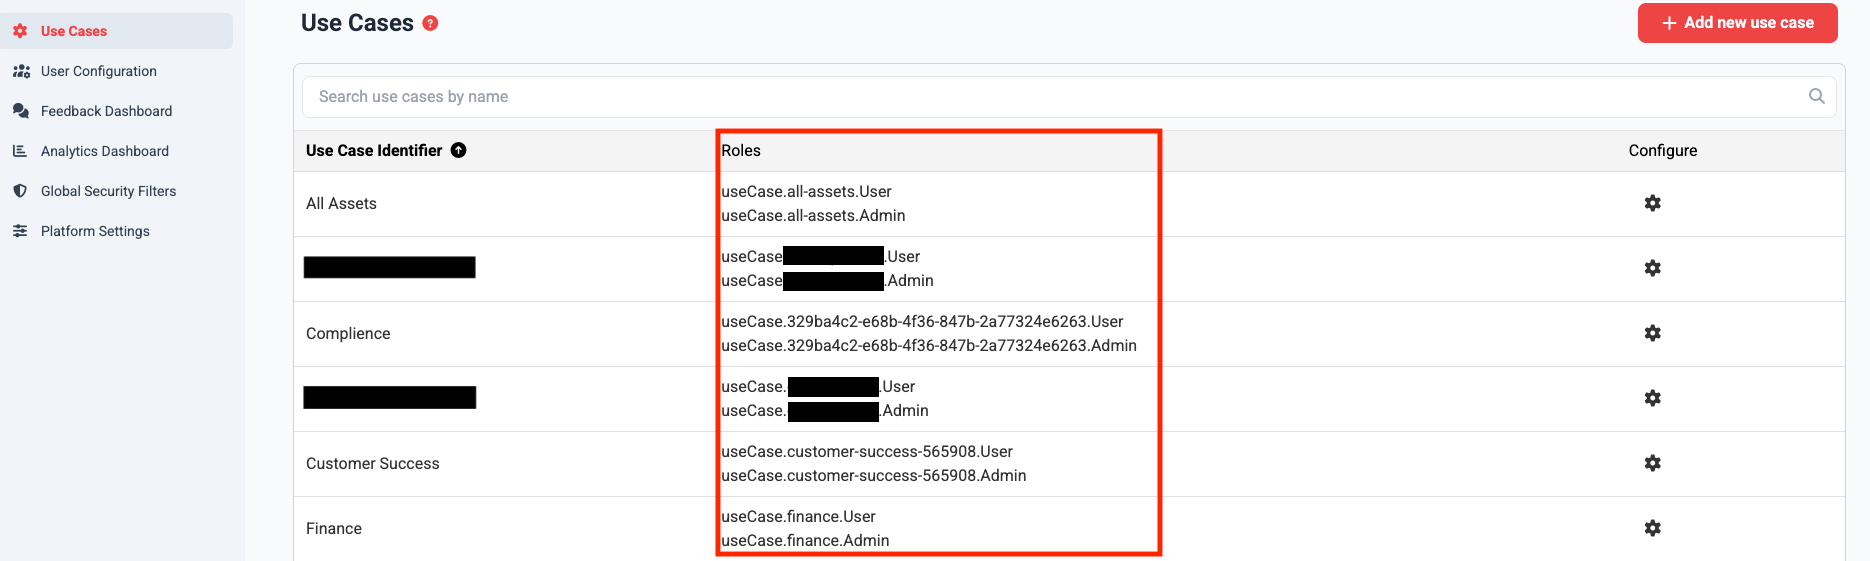
Put the Required Permissions Together
Permission for Admins
- For admins, the permission with the notation
useCase.[UseCaseID].Adminis needed. - Reach out to your contact person of the IAM to create a admin group and assign users and the role permission.
Permissions for End Users
- If you already know, that all end users of the use case should have access to the use case, you can create a end user group and assign the standard role for end users with the notation
useCase.[UseCaseID].User. - If this is not the case or you are not sure, this step should be performed by the Agent Admin.
Note that custom roles currently have to be created by Genow.
Match the Permissions to the Relevant Permission Group, Then Hand the Document Over to Your Contact Person
You know have to assign the permissions to needed permission groups. Provide your contact person with:
- All permission groups,
- The associated role permissions per group and
- the users per group (usually their email will be needed).
(3) Optional: Prepare the Setup of Data System Connectors
Agent Admins are responsible to set up knowledge sources via the admin panel and connect to various data systems like Jira, SharePoint and Confluence most of the times. Helping them to perform the necessary preparation will make the setup of Agents much quicker. In the following you will find the relevant articles for that:- SharePoint (connect SharePoint site to SPN),
- Google Drive (connect Google Drive),
- Jira (create a account or a personal access token),
- Confluence (create a API token for a service account user)).
You have to provide Genow with the relevant credentials to each system.
In some cases it can make sense for global platform admins to completly set up and manage some or all Agents on the platform. If this is the case, you can follow the steps described in our article about the setup of knowledge in an Agent.