> ## Documentation Index
> Fetch the complete documentation index at: https://docs.genow.ai/llms.txt
> Use this file to discover all available pages before exploring further.
# QR-Code Agent Access without Authentication
> Grant access to restricted versions of Agents for users without authentication.
As an Agent Admin, you can now create QR codes and access links to restricted versions of Agents. That way, anybody can access these specific Agents without prior role creations and authentication. You can adjust which data, i.e., knowledge assets, should be included in the restricted Agent version. Also, an expiry date can be set to temporarily limit access. For a single Agent you can create multiple QR codes and access links that may each represent a different restricted configuration, e.g., a different selection of knowledge assets. The familiar Genow answer quality and precision is kept.
## Benefits
* Access for anybody that receives the QR code / link with no authentication needed
* Access from hand-held devices like smartphones
* No time spent on authentication setup
* Increased options for self-service for end users (employees, customers)
* New applications, like QR code stickers on machinery or in salesrooms (see below)
* Restrict knowledge available
* Well-known Genow answer precision
## Application Examples
Example differ between allowing internal users to access specific information quickly to creating an unique value for your customers and partners:
* Hardware Maintenance and Instructions: Put a QR code sticker on machines or equipment. Service technicians can directly ask questions about service history, maintenance, and general instructions about this machine. No walking to a dedicated pc is needed, everything happens on a hand-held device
* Instant IT support: Put a QR code sticker on your employees laptop. No more searching the intranet for the correct IT support subpage. Your employees can instantly access and ask questions on their IT hard- and software from their mobile phone. No explicit role configurations for each employee are necessary.
* Project Onboarding: Handout QR codes to new project members to ask anything about the project history. Fast and easy, without any authentication setup required. Also, you can share a „single link of truth“.
* On-site sales support: Equip your salesrooms with QR codes on certain topics for your customers to access. Let them compare the products you sell, may that be in department stores, car dealerships or supermarkets.
## Possible Settings
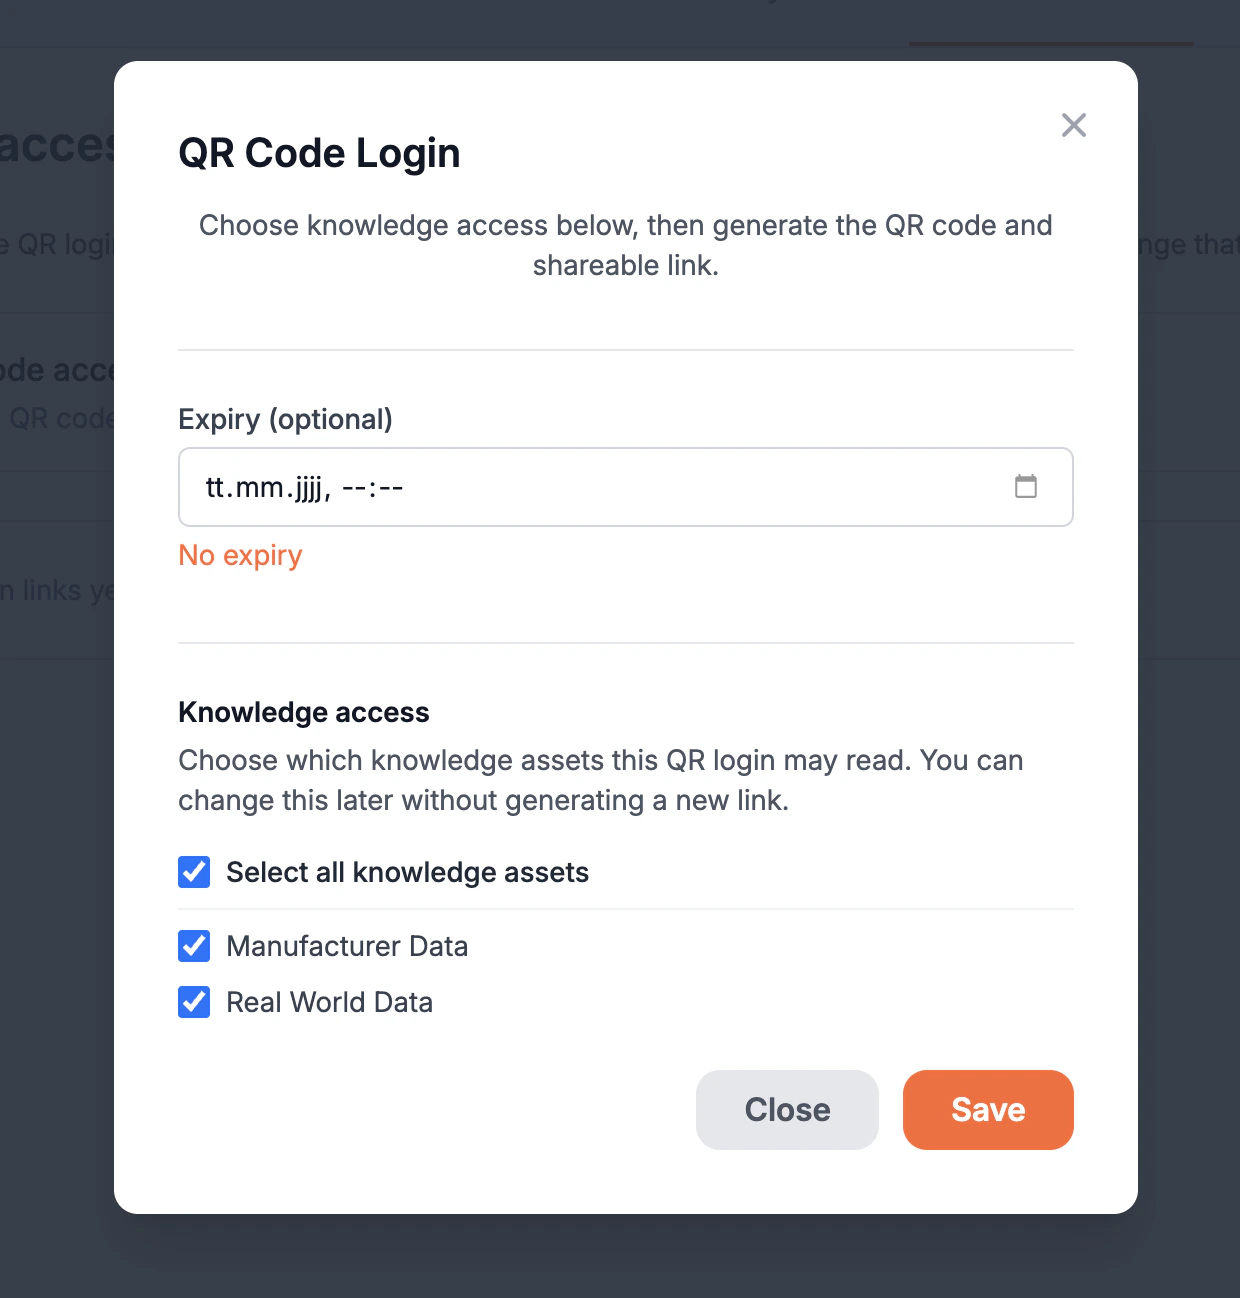
* Expiry date: Define an expiry date from which access is no longer possible. This may be beneficial for temporary applications or security reasons. This setting is optional.
* Knowledge asset selection: Select only the knowledge assets you really want to include. By that, you can assure that no information is leaked to users without authentication.
* Multiple QR codes per Agent: You can create multiple QR codes per Agent. This allows you to have different variations of the same Agent, comprising only the necessary information and tailored to the specific business need.
## Prerequisites and Important Notes
The **Source Permission Check** must be disabled at the Agent level for QR Code access to work. If the permission check is enabled, guest users (without an account) will be blocked from receiving answers. Navigate to your Agent settings to disable it.
For the **Support Button** feature to be available, **Public Share** must be activated at the platform level. Ask your Global Admin to enable this in the platform settings if it is not already active.
## How to Set Up QR Codes And Access Links
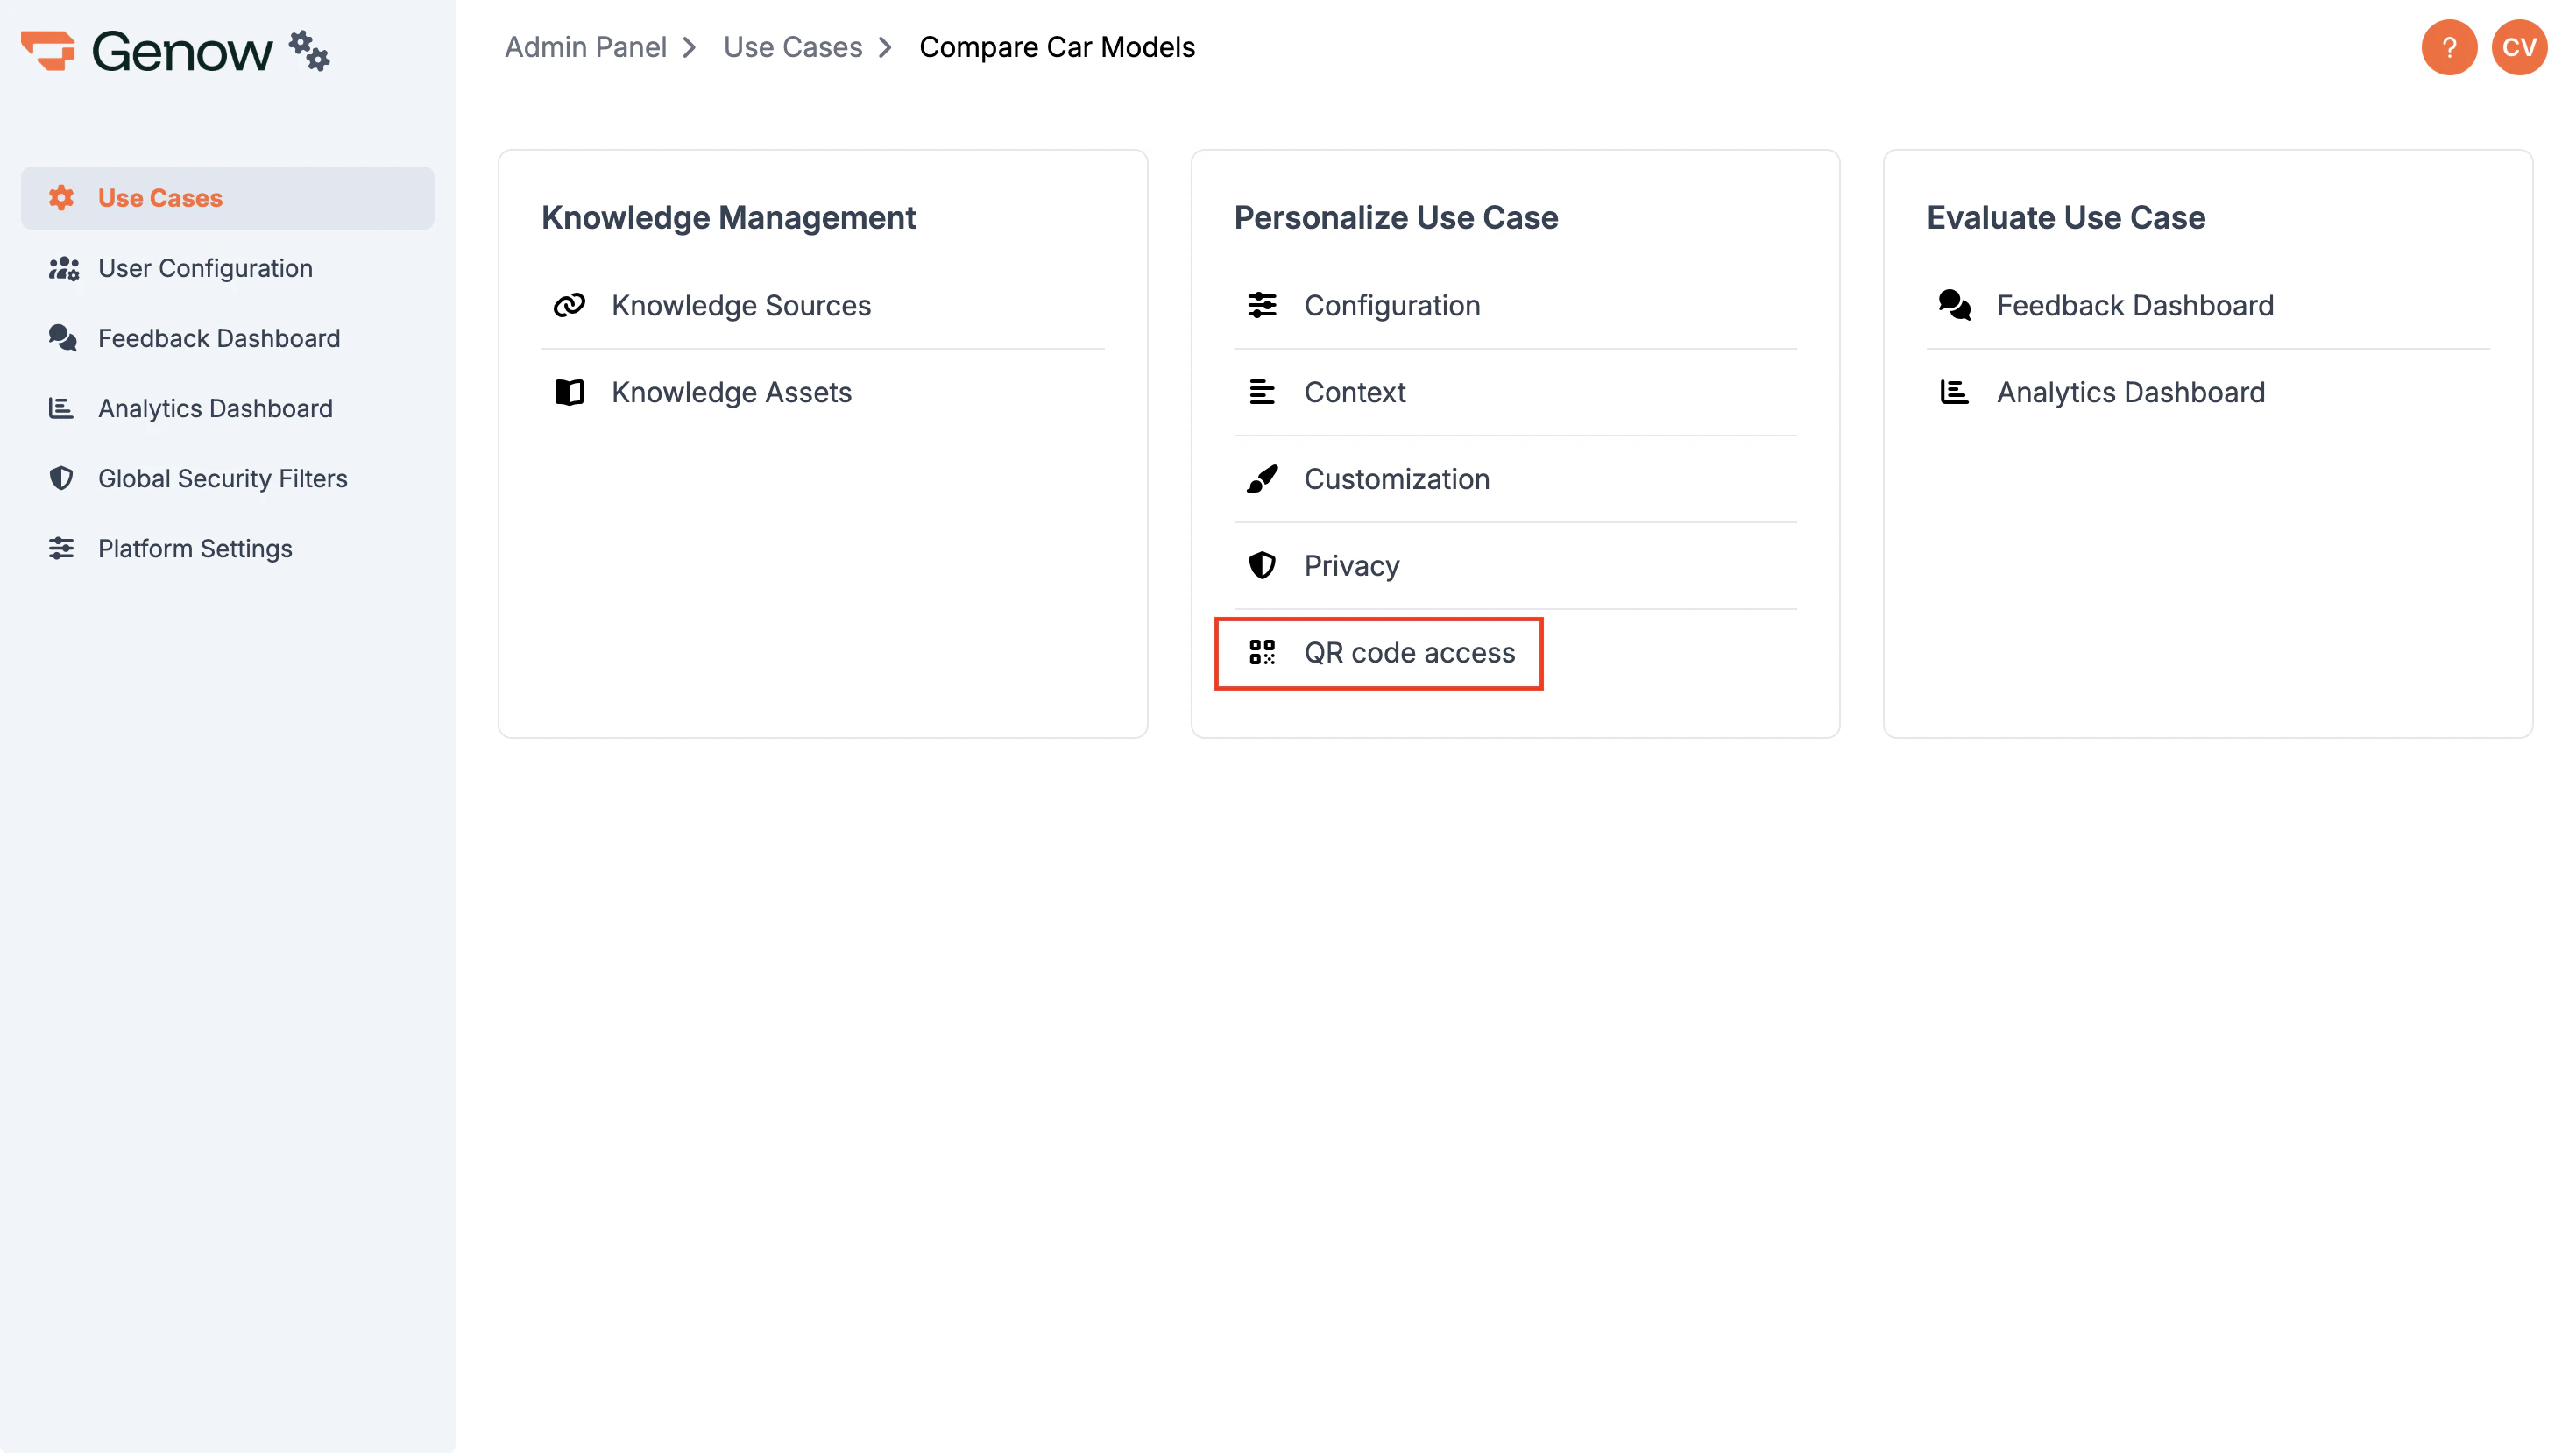
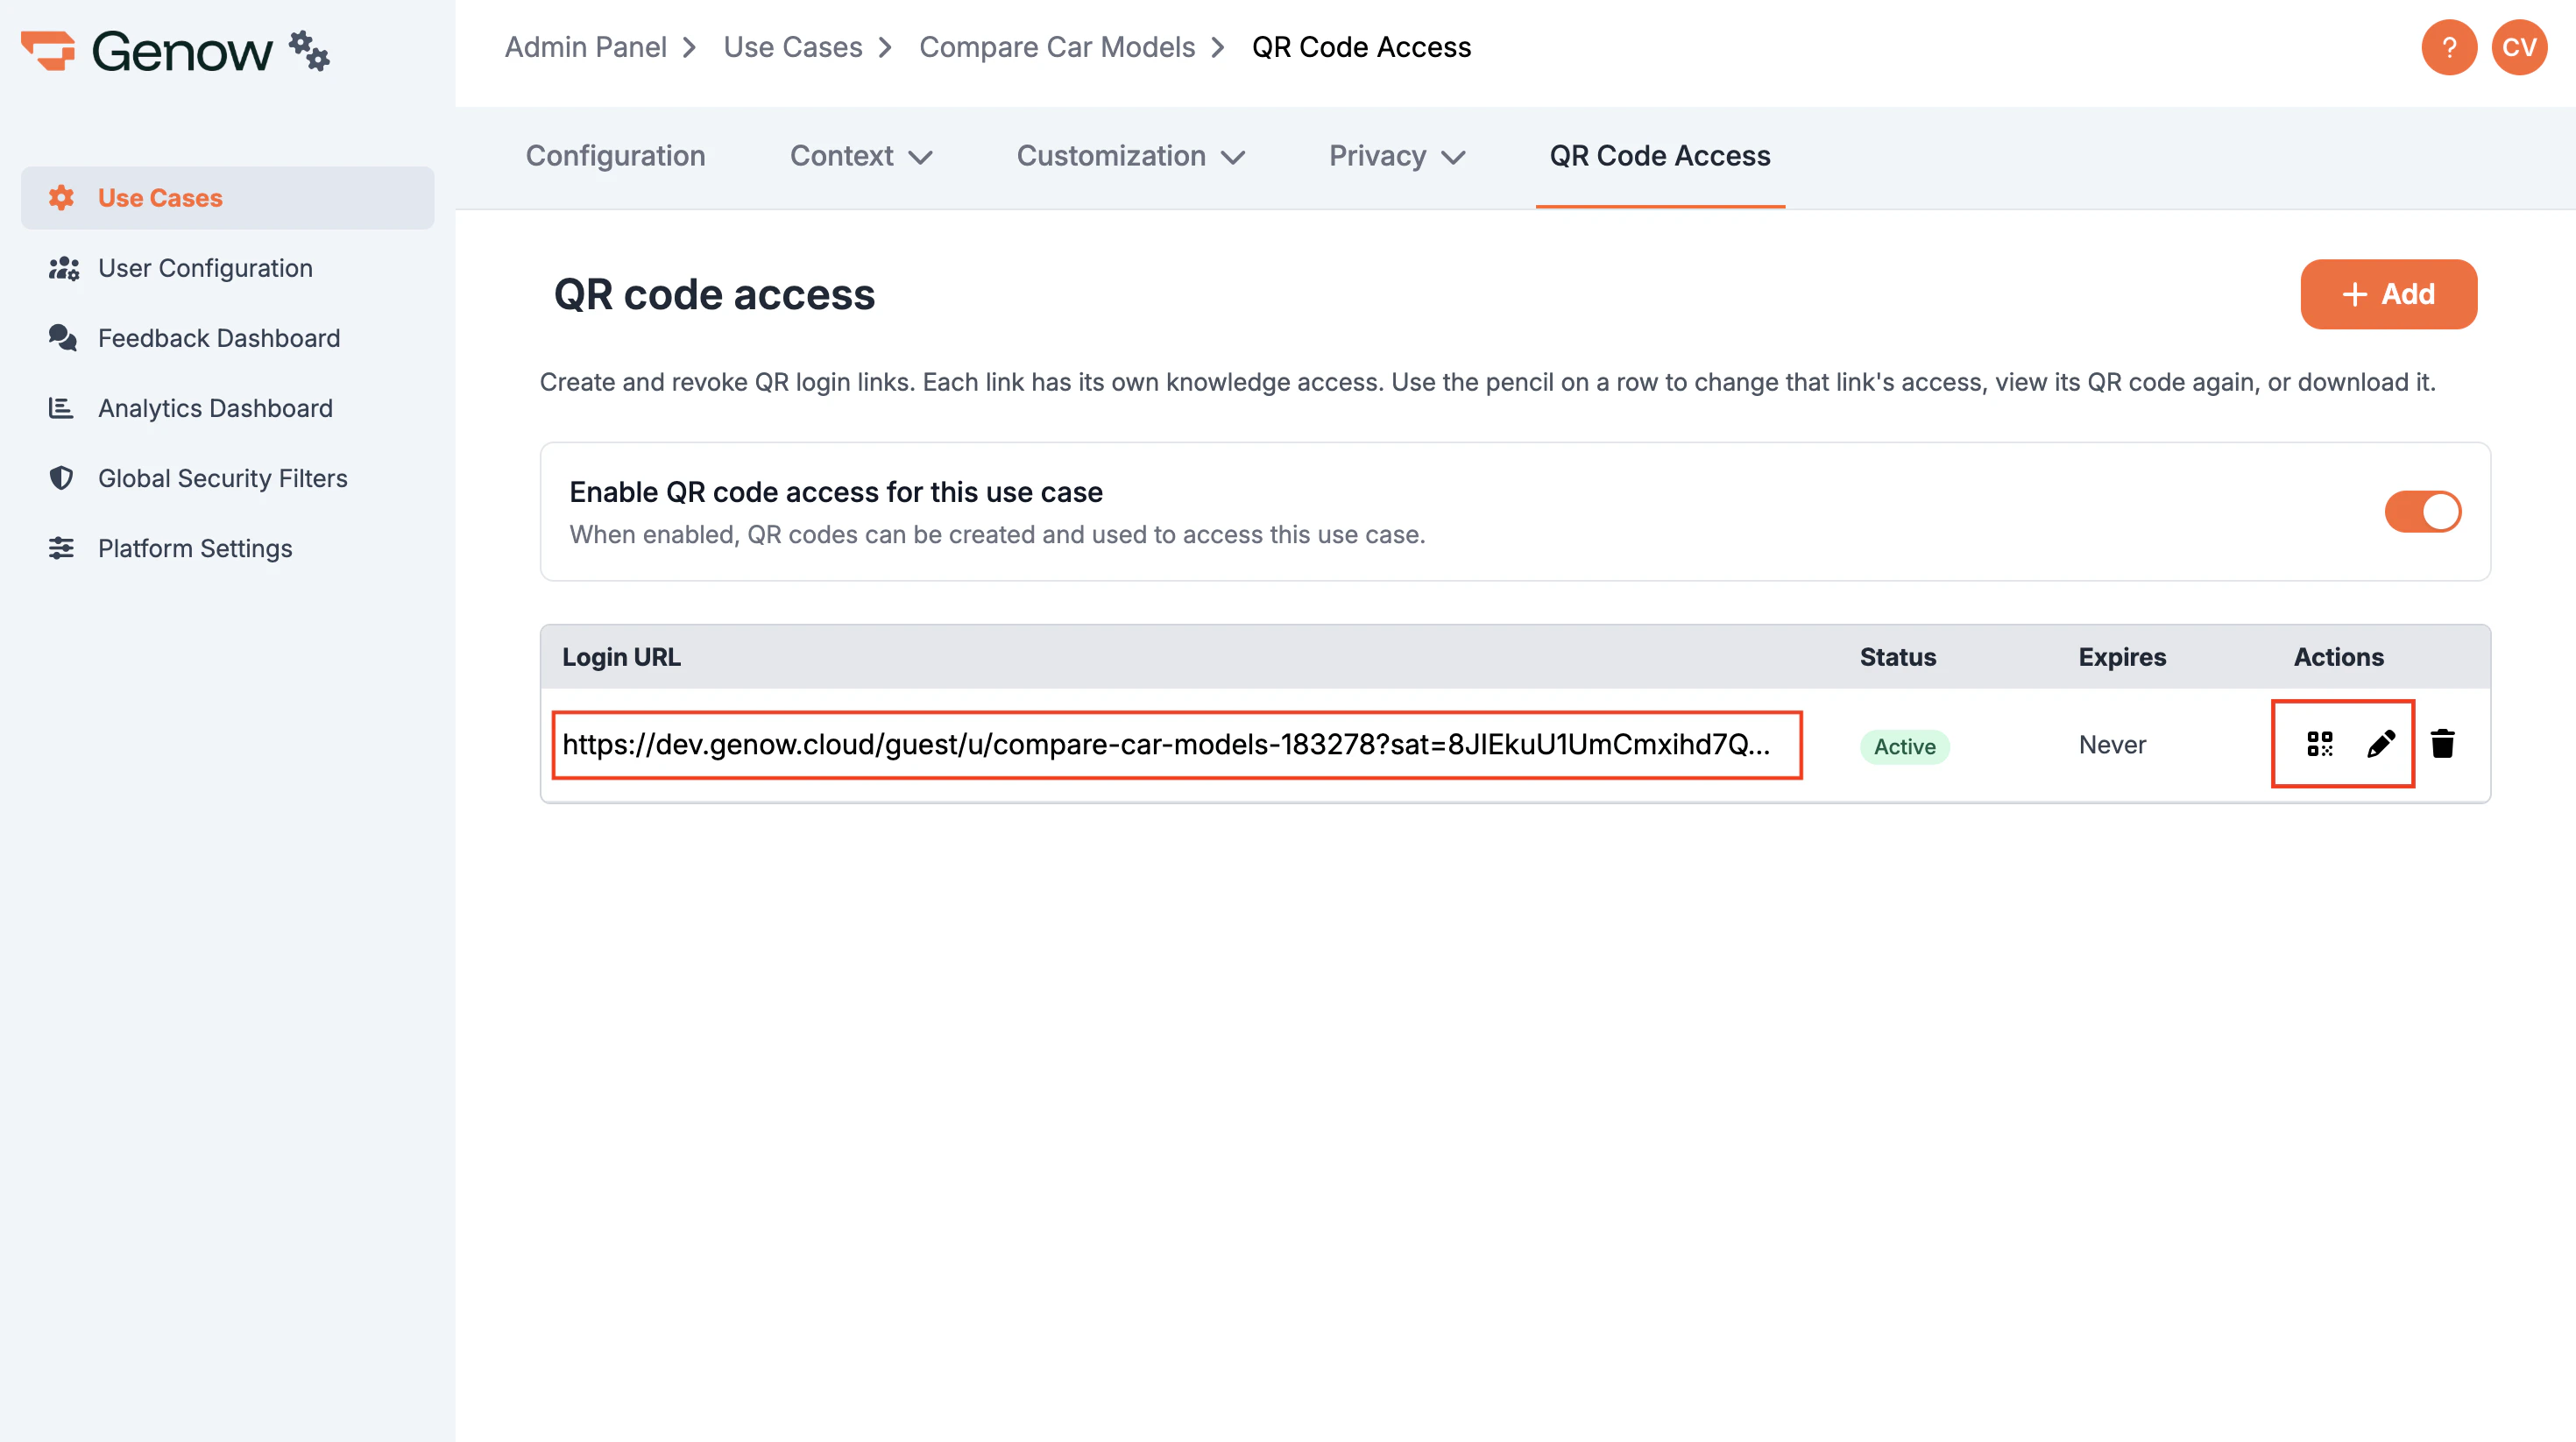
First, you have to activate QR code access for the desired Agent. Therefore, navigate to the Admin Panel, select the Agent, navigate to „QR Code Access”, and toggle the switch.
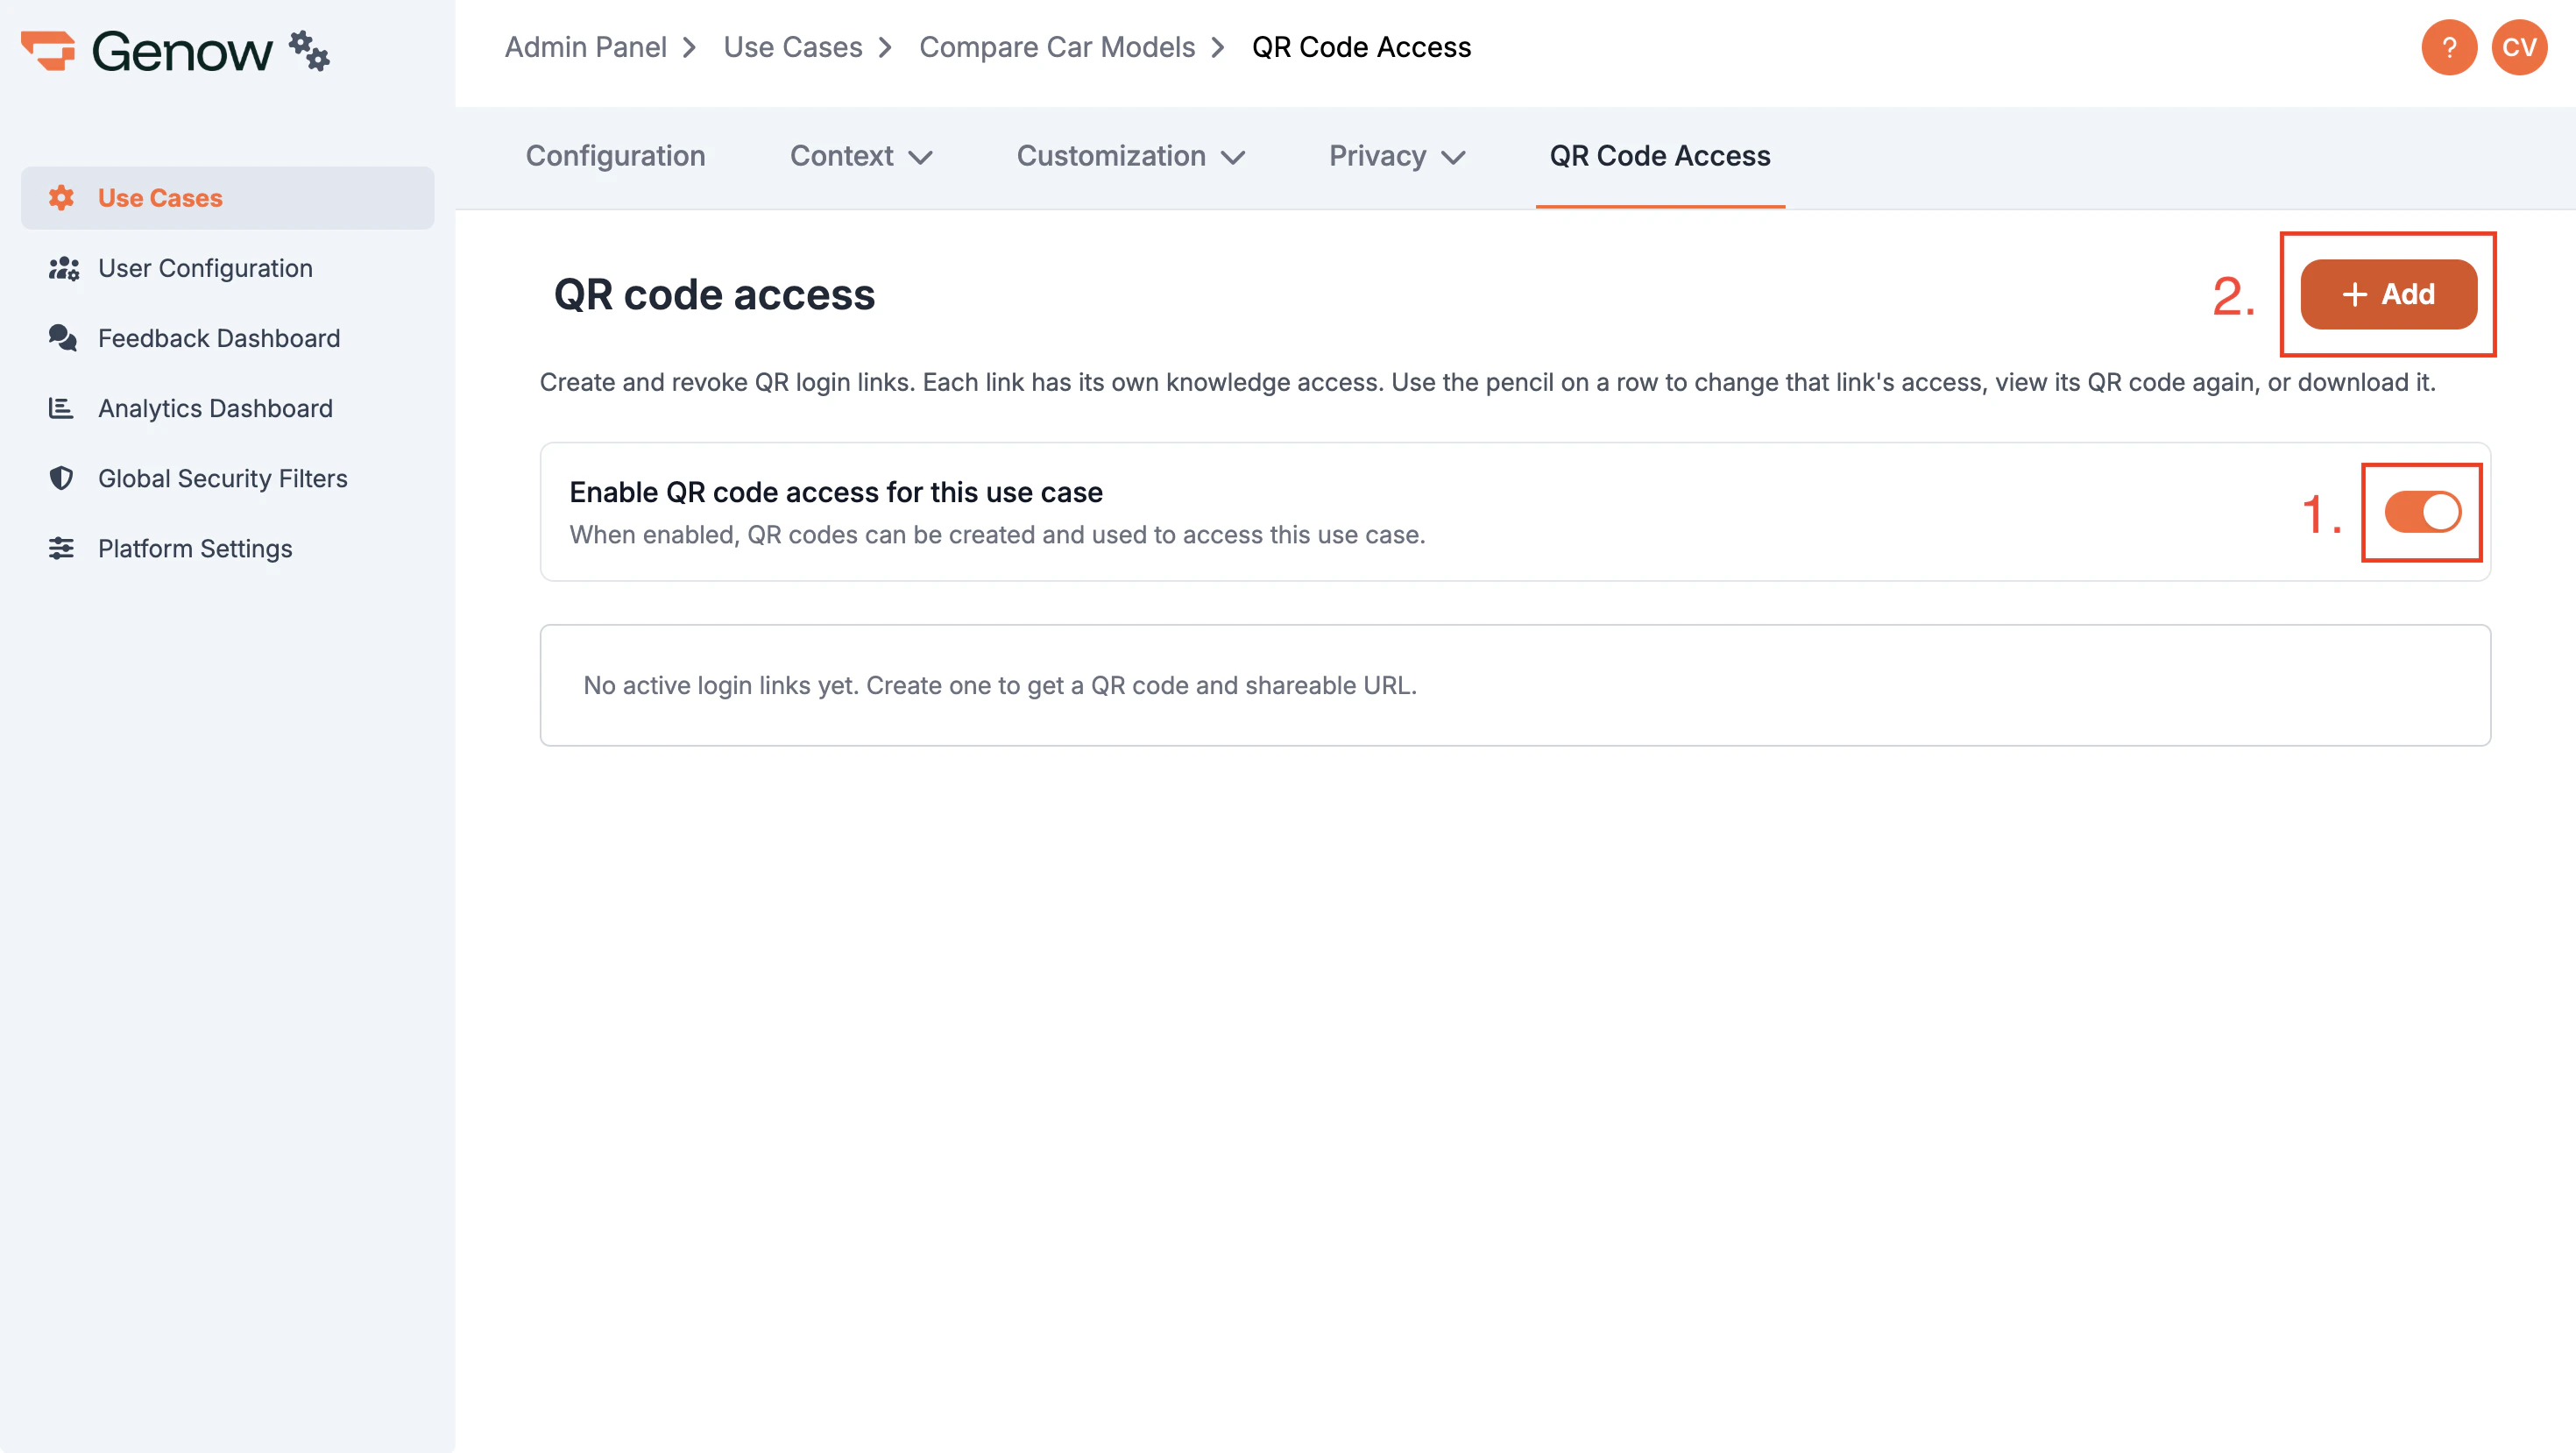 Then, create a new QR code via the „Add“ button. Define the settings on expiry date and knowledge asset selection as desired. Click „Save“.
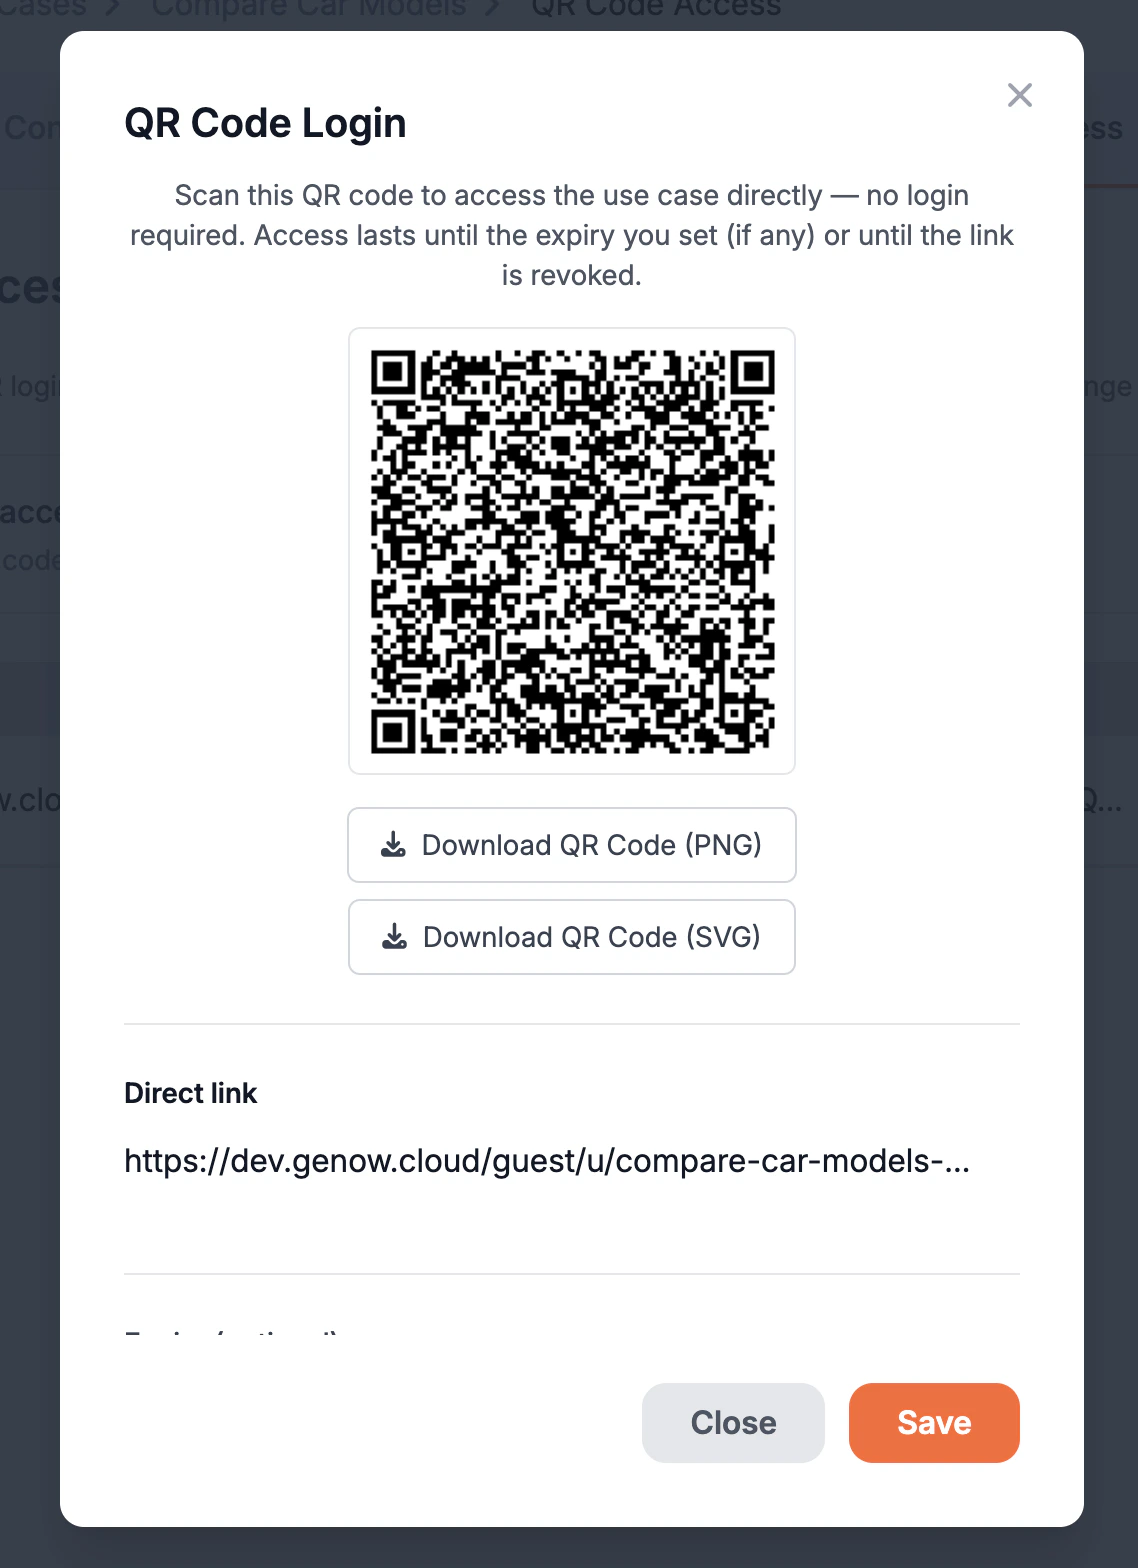
 After that, the QR code and link are generated. You can download the link (as svg and png) as well as copy the link. You can always receive the QR code and link again after that. Click „Close“.
 You can always edit existing QR code accesses and obtain the QR code and link. Also you can delete existing accesses and create additional ones.
 Lastly, distribute the QR code and link to your end users, e.g., by putting stickers and your hardware or distributing the link within your organization.
***
## Support Button
The Support Button allows guest users (those accessing the Agent via QR code without an account) to escalate an unanswered question directly to a support email address.
If a guest user submits a question and the answer does not resolve their issue, they can click the Support Button to send their question - along with the conversation context - to a configured email address. This enables a simple escalation path without requiring the user to have an account or log in.
**Prerequisite:** Public Share must be active at the platform level. Contact your Global Admin if the Support Button option is not visible in your Agent settings.
### How to Configure the Support Button
1. Navigate to the Admin Panel, select your Agent, and open Agent Settings.
2. Go to the QR Code Access tab.
3. Enter the support email address in the **Support Button** field.
4. Click Save.
Once configured, guest users will see the Support Button on the QR code access page after receiving an answer from Genow.
Lastly, distribute the QR code and link to your end users, e.g., by putting stickers and your hardware or distributing the link within your organization.
***
## Support Button
The Support Button allows guest users (those accessing the Agent via QR code without an account) to escalate an unanswered question directly to a support email address.
If a guest user submits a question and the answer does not resolve their issue, they can click the Support Button to send their question - along with the conversation context - to a configured email address. This enables a simple escalation path without requiring the user to have an account or log in.
**Prerequisite:** Public Share must be active at the platform level. Contact your Global Admin if the Support Button option is not visible in your Agent settings.
### How to Configure the Support Button
1. Navigate to the Admin Panel, select your Agent, and open Agent Settings.
2. Go to the QR Code Access tab.
3. Enter the support email address in the **Support Button** field.
4. Click Save.
Once configured, guest users will see the Support Button on the QR code access page after receiving an answer from Genow.